Thursday, January 29, 2009

The Art of Bread Making

I love making bread. I have been making our family's bread for just about as long as I can remember. As a result, it is very easy for me and I can whip up a few loaves at a moment's notice. (Okay, I actually need about 3 hours notice, but you know what I mean). Homemade bread is so wonderful that when you bring a loaf to someone, they act as if you have just mastered French pastry-making!

One time, I can remember, we were having a backyard barbecue for a few friends. It was raspberry season and I had gone the day before to pick raspberries with my sister. I slaved over the making of two wonderful raspberry/peach pies. I poured my heart into them, even making woven lattice for the top. I couldn't wait to offer them to my guests. A few hours before they were to arrive, I got concerned that we might not have enough food, so I decided to whip up a few loaves of bread. Absent-mindedly, I tossed the loaves together and baked them.

When dinnertime arrived, the comments rolled forth about my bread. "Oh, this is the best bread I've ever tasted." "Oh, I can't believe you make homemade bread." "How in the world do you do this?" "I could never make bread. It is so difficult." I don't think it took more than about 20 minutes of my actual attention. When I served the pies, which were delicious I might add, I think a couple of people said they were good. Humph. THOSE had taken forever!

Many times, I get asked for my bread recipe, which I willingly share. However, several times the recipient has told me their bread didn't turn out the way mine did. That is because bread-making is an art, not a science. You can't just get a recipe, follow it exactly and have great bread. There are a number of factors at work:
  • the bread-maker's intuition (which comes from experience)
  • the quality of the ingredients (type of flour, freshness of yeast, type of fat/sweetner, etc.)
  • the equipment used (oven temperature, pans, mixer, etc.)
  • the environment (temperature, humidity)
Keeping these factors in mind, I would like to share my bread recipe/method with you. This is a basic recipe for a 5 qt. Kitchen-Aid. Bosch users can double the recipe. It can also be halved. In fact, you can adjust it just about any way you like. :) It's a free country. Also, following, I will share my recipe for a 20 qt. Hobart mixer. Through trial and error, I have found that our family likes mostly whole-wheat, but not totally whole wheat. This recipe yields a bread that is about 2/3:1/3. This is kind of a tutorial, though I don't have very many pictures. Let's get started.

Mostly Whole-Wheat Bread
makes 3 - 1 1/2 lb loaves

3 c. warm water
1 T. yeast
1/4 c. fat (I prefer melted butter or coconut oil)
1/4 c. sweetener (I use either honey or organic unrefined sugar -- use whatever you like, but no artificial sweeteners, please! We are trying to feed the yeast and yeast, unlike humans, is too smart to consume them.)
1 T. salt (I use a coarse, unrefined gray salt)
6 c. hard wheat berries if you have a grain grinder or 6 cups whole-wheat bread flour, if you don't
3-4 c. unbleached bread flour
1/3 c. gluten flour

(A note about flour: In doing the detective work with people who have told me their bread didn't turn out as well as mine, I have found the culprit is often the flour. The grocery store just doesn't seem like it is a very good place to buy flour. We have purchased for years from a local flour mill and can now buy the same flour at a small local store. (The mill stopped selling directly.) Grinding your own wheat is also an option with many benefits. Alternatively, you could try a food buying co-op or a health food store or maybe a local bakery. The exact brand of flour is not the issue. It is the freshness. Find good, fresh flour and your bread will be much better. Be sure to get 'bread' flour, not all-purpose. It has the highest protein content, making well-developed gluten.)

Place the water in the mixer bowl with the yeast. Stir a little to combine. Leave it to sit for a few minutes while you melt the butter. Yes, you can do this in the microwave and I admit that I often do, but it really isn't good for your food. Just get out a little pot and melt it on the stove. Stir in the salt and sweetener and combine. It doesn't matter if they dissolve. Grind your wheat if you are doing so.


Add the whole wheat flour, gluten flour and butter/salt/sugar mixture to the bowl. Put on the dough hook and turn on the mixer (stir speed at first, then speed 2 when the flour is no longer in danger of flying out) to combine everything. Once it looks pretty uniform, you can either leave it to sit for 15 minutes or so (sometimes I do, mostly I don't) or you can just start adding in your unbleached flour.

With the mixer running on stir speed, I add in the first couple of cups of remaining flour one cup at a time. Allow the dough to assimilate the flour before adding more. After the first two cups, I start adding it 1/4 c. at a time, mixing well after each addition. Knowing when to stop adding flour is a learned skill. You want to watch for the dough to start cleaning the side of the bowl. At first, when there is not enough flour added, you will notice that the dough will start sticking more to the sides. Add some more flour and wait patiently for it to assimilate. Eventually, it will become a nice smooth ball and will clean up the bowl. (If you aren't sure, err on the side of a little too sticky.) Now, you can turn the mixer up to speed 2 to knead the dough.

Knowing when to stop kneading is also a learned skill. With the Kitchen Aid, I find it is somewhere in the neighbourhood of 6 minutes. However, this is a very general guideline. When you think the dough looks nice and smooth and has kneaded for awhile, stop the mixer and pull off a golf-ball sized piece of dough. It should feel a bit like your earlobe. More importantly, though, you can do the 'window test'.


As you can see in the above picture, when stretched, I can see light through my dough without it ripping. This means the gluten has developed enough and the bread is ready to be set aside to rise. If you try to stretch it and you cannot get a window without it ripping, be patient and knead it some more until you can.

Remove the dough from the bowl and put a little splash of oil in the bowl. Form the dough into a ball and turn it around in the oil to coat both the dough and the bowl. Now, cover the dough. It would be much more romantic and healthier to cover the dough with a nice cloth. However, I find that I end up with dough sticking to the cloth, even if I wet it. I hate to post this, but I actually cover it with a plastic bag. (I'm so sorry.) I find it keeps the dough from drying out.

Place the bowl in a warm oven. 110 degrees is ideal, but many ovens don't have a 'proofing' setting. I was seriously ticked off when we bought a new stove and I found out it didn't go below 170 degrees. Apparently, the manufacturers think people are too dumb to cook their food at an appropriate temperature, so they make the oven unable to go below a setting which will sterilize the food. We need the yeast to stay alive to rise the bread, so killing it will not do. What I do is, begrudgingly, put my dough in the oven, set the temperature to 170, turn the timer on for 2 minutes and turn the oven off when it beeps. At no time do I open the door. This seems to work well.

Let the dough rise until doubled, about an hour or so. Punch it down to deflate it and squish it up a bit. Now, I suggest using a kitchen scale, but you don't have to. Measure out 1 1/2 lbs of dough, or just cut it into about 3 equal parts. I like measuring because then they all turn out even. Of course, adjust quantities up or down a little to even things up.

Prepare your pans. My friend, Elisa, shared a kitchen secret that has changed my life. If you combine 1/2 quantity of liquid lecithin with 1/2 quantity of oil, mixed together and brush this very lightly on your pans, grains will never stick to them. It is like magic. No more muffins sticking to the pans. No more bread ripping off in chunks. It is wonderful stuff. :)

(A note about pans. The type of pan you use makes a difference, particularly when baking whole wheat bread. Whole wheat bread needs a slightly narrower pan for support than white bread. My favourite pans are Norpro, which I bought here. She also has great bread bags, by the way. I was also lucky enough to find a few very similar pans with the namebrand 'Kaiser' at Winners, but I haven't seen any there since.)

Shape into loaves. To do this, I form each piece into a ball and then pinch the bottom in a few times. Making nicely shaped loaves is another learned skill. :) Place in pans and return to oven. Make sure they have lots of space around them to rise. Warm oven as above and leave to rise. Watch until the loaves are risen a bit less than you want them to be in the end. Leave them in the oven and turn the oven on to 350 degrees F.

Bake somewhere around 45 minutes, give or take. Knowing when to take the bread out is...say it with me, now...a learned skill. I watch for:
  • smell - you can tell when they are done because the house just smells right -- like super-yummy bread, not too yeasty and not overdone. You will get to know the smell. (You can use the smell method for cakes, too, by the way.)
  • sight - the bread will be nicely browned all over
  • sound - if you tap the bottom, it should sound hollow. I admit that I don't completely get this one, but it might be helpful for you.
If you aren't sure, err on the side of a little overbaked, rather than underbaked. Another 5 mintues at 350 degrees won't hurt.

Tip the loaves out right away and leave them on a rack to cool. Let them cool as long as your self-control allows before slicing. 30 minutes is pretty good. If you slice them before this, you will probably crush them. I have also heard that too much steam will escape and the remaining bread will dry out too quickly, but we don't have experience with any 'remaining' bread. ;)

Bread Recipe for 20 qt. Hobart Mixer
makes 12 - 1 1/2 lb loaves

12 cups warm water
1/4 c. yeast
1 c. honey/sugar
1 c. melted butter/coconut oil
1/4 c. salt
3/4 c. gluten flour
20 c. hard wheat berries
Approx 8 c. unbleached bread flour

I combine everything but the unbleached flour and then leave to sit for 15 minutes, or just jump into the next step. I follow the basic method outlined above, except that I add in the flour 1 c. at a time. I timed how long I had to knead after adding all the flour and was very surprised that it took 20 minutes on speed 1 before the dough passed the window test.

I need to do two bakings, since my oven will only really hold 6 loaves at a time.

I hope this is helpful to you! I love helping others learn to make bread and would be happy to answer any questions in the comments section. :)

Tuesday, January 27, 2009

Organizing more than I bargained for.

Today I thought I would tackle cleaning out the cabinet under our kitchen sink. It houses a few cleaning products, the dish rack (so it isn't on the counter all the time), the crock pot and some junk. It is all just kind of shoved in there with no organization and I didn't like it one bit. So, I found a sturdy plastic bin to house all the cleaning supplies and I was ready to hunt down the junk and leave the cupboard nice and tidy.

I got started and noticed that things seemed to be kind of wet. Awhile ago, I had given baby guy his last sink bath. It was his last because he did an insane amount of jubilant splashing and made a large mess. I thought maybe this was leftover water that I had somehow missed. I pulled out a few more things and was horrified to find that the board at the bottom of the cupboard was completely wet. It was like a wood-sponge. Ewwwwwwww. Now, this board was lining the bottom of our cupboard because the previous owners of our house had some kind of leak, the bottom of the cupboard ended up with a hole and we just stuck a nice sturdy board on top of the hole instead of ripping out the whole bottom of the cupboard. Well, now I had to pull out the good board and survey the damage. At this point, I did what any capable adult woman would do. I called my dad.

I had to drive to the store to buy a flashlight because we never seem to have one. This one will stay in the kitchen and I will guard it with my life. With my trusty new flashlight, my dad coached me through the diagnostics and I discovered that it didn't seem to be coming from an actual pipe or the drain. The problem was around the plate at the base of the faucet. When Steve and I put in a new faucet a few months ago, we didn't caulk it. Whoops. Combined with the fact that the sprayer had twisted a bit loose and would pour out water along the hose every time the tap was turned on, we had a fair bit of water under the counter.

I had to pull everything out from the surrounding cupboards to check for water. Of course, with everything out, it was a good time to wipe down the insides of all the cupboards, a job that - in all honestly- rarely gets done. We tightened up the sprayer, caulked around the faucet and have banned everyone from using the kitchen sink for 24 hours until the caulking is good and cured.

I must say...if I had to choose between having a functional kitchen sink and not having a functional kitchen sink, I'd choose to have one.

Monday, January 26, 2009

Awarded!

Woohoo! I am so excited. I got an AWARD! That is an honour for me since it was given to me by a reader and fellow blogger. :) Thanks so much, Debbie.

Anyway, though I can't think of 10 blogs to award, I would like to pass this award onto the following worthy and wonderful blogs:

Eyes of Wonder
Large Family Mothering
PeaceLedge
The Garden Gate
Elsa Beauty
Herbs and Health

Congratulations, ladies! To claim your award, you need to:
Thank the person who gave the award to you, post the award on your blog or on a post, nominate 10 blogs which show great attitude/gratitude, link to the people you chose on your post, and comment on their blogs to tell them about the award! Don't forget to click on the image in this post so you can display your award in a sidebar. :)

That was so funny I forgot to laugh.

Photo courtesy of Márcio Cabral de Moura

Oh my gosh. I just finished listening to my children sing about 1,000 different versions of "I see London, I see France, I can see your underpants." Is there no mercy for the hardworking mother?

Friday, January 23, 2009

I have something to tell you.

My red mixer is broken.

I happened awhile ago as I was mixing up a batch of 9 loaves of bread. I heard a clunk that didn't sound at all good, along with a nasty dragging sound. The hook had stopped turning. Very worried, I took out the dough, which by this time was pretty much done and turned on the mixer briefly. Nope. It was definitely seriously broken.

Upon investigation at the repair shop, it was discovered that a gear was broken. It had been repaired before, apparently, but the problem was not at all helped by the fact that it was completely dry. Jim, the wonderful man who gave us the mixer, had told me he had greased it, but we needed to do it again before using it. I didn't and that is why it broke. It is not a nice feeling to know you have been responsible for breaking an antique Hobart!

Our main problem at this point was to try to find a new part. It was not going to be easy as Hobart is not able to identify the model number of my mixer since it is an antique. My dad said he would take on the task of trying to find something.

The next thing I knew, though, my dad called to tell me he was driving to a little town a couple of hours away to buy me a new Hobart! (Well, not new. Probably by now you know what I mean when I say, 'new'. We do have a certain level of thriftiness to uphold, afterall.) Steve and my dad took a long drive last Friday and arrived home with this:


It is a 20qt. A-200 Hobart. I am floored. What a blessed mama I am to be surrounded by such incredibly generous family members. Imagine being given two Hobarts! I was immediately back in the bread factory business. Yesterday, I mixed up another 12 loaves. Here are the first six in my oven, ready to start rising:


I was thrilled to be baking bread again and our tummies were very happy, too. Sadly, though, my heart was still heavy. I had been given a beautiful, antique mixer by two very kind and generous people, we had it painted up to be a stunning accent in our kitchen (some people thought it looked like a fire hydrant, but what do they know?), baked up a few large batches of bread and cookies and proceeded to break it. It seemed such a shame to just abandon it for lack of a gear. I prayed for a solution for several days.

I hadn't told many people about the mixer breaking, as it was too sad for me. However, one day I shared the news with a dear friend. After consoling me (and congratulating me on the new one), she asked me what I was going to do with the old one. I had my answer. Her husband believes he knows someone who can make a replacement part. She will give the mixer a new home as she bakes bread for her five children and I can still come and visit it. Thank-you, Lord!

Thursday, January 22, 2009

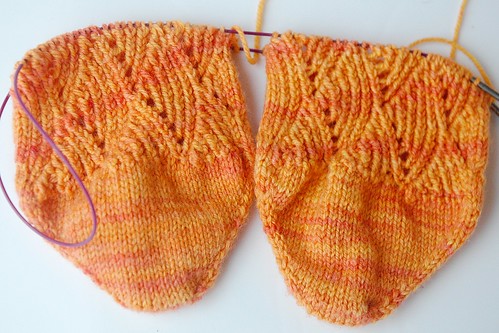
Knitting: Charts vs. Text Directions featuring Pomatomus Socks


(This is a little bit of knitting technical stuff, so if you aren't into knitting, feel free to skip today's post. Mostly, it is to be a home for the text directions I've 'interpreted' from a chart of a sock pattern I am working on. I want to be able to link others here who prefer text directions.)

When knitting, there are two ways instructions for the pattern are written, in text or chart format. A chart uses symbols to represent the different stitches to be worked. Text format just tells you outright. Some people's minds work in such a way that the symbols just make perfect sense to them and are very easy to understand. Other people find it tedious to work with symbols because their mind never seems to 'click' to get into the rhythm of understanding them this way and a lot of effort is required to knit from a chart as a result. I am this second type of person. I just need it spelled out for me.

I had been working on some new, lovely socks called Pomatomus Socks. The designer, a knitting genius, has a mind that just seems to 'see' the pattern from the symbols on a chart, so her patterns are often written this way. I was enjoying the pattern, but finding it very tedious, so I decided to type up the directions in text. To make them easy to follow, I created a little set of index cards that I could flip over as I completed two rounds.


Here is how to make your own cards like I did:

  1. Type up the text instructions from the chart, round by round. (Of course, copy mine below if you are doing Pomatomus socks.)
  2. Double and triple check them, making corrections as necessary.
  3. In your word document, set up the page in 'Landscape', change to 'two columns', and add two spaces between each round of instructions.
  4. (I changed the font to 14.)
  5. Print the pages out.
  6. Cut the directions out into strips of two rounds at a time.
  7. Glue the strips onto index cards (so that two rounds are on each card).
  8. Hole-punch the cards and put them onto a little ring.
I believe that I heard this idea from Kelley Petkun on my favourite knitting podcast, KnitPicks.


If you are here just for the text directions for Pomatomus Socks, here you go:

Cookie A’s Pomatomus Socks

Chart A (each line is repeated 6 times per round)

Round 1: (K1 tbl, P1) 5 times, K2tog tbl, YO

Round 2: (K1 tbl, P1) 4 times, K1 tbl, K2tog tbl, P1, YO

Round 3: (K1 tbl, P1) 4 times, k2tog tbl, P1, K1 tbl, YO

Round 4: (K1 tbl, P1) 3 times, K1 tbl, K2tog tbl, P1, K1 tbl, P1, YO

Round 5: (K1 tbl, P1) 3 times, K2tog tbl, (P1, K tbl) 2 times, YO

Round 6: (K1 tbl, P1) 2 times, K1 tbl, K2tog tbl, (P1, K1 tbl) 2 times, P1, YO

Round 7: (K1 tbl, P1) 2 times, K2tog tbl, (P1, K1 tbl) 3 times, YO

Round 8: K1 tbl, P1, K1 tbl, K2tog tbl, (P1, K1 tbl) 3 times, P1, YO
Round 9: K1 tbl, P1, K2tog tbl, (P1, K1 tbl) 4 times, YO

Round 10: K1 tbl, K2tog tbl, (P1, K1 tbl) 4 times, P1, YO

Round 11: K2tog tbl, (P1, K1 tbl) 5 times, YO

Round 12: YO, (K1 tbl, P1) 5 times, K2tog tbl

Round 13: P1, YO, (K1 tbl, P1) 4 times, K1 tbl, K2tog tbl

Round 14: P1, K1 tbl, YO, (K1 tbl, P1) 4 times, K2tog tbl

Round 15: P1, K1 tbl, P1, YO, (K1 tbl, P1) 3 times, K1 tbl, K2tog tbl

Round 16: (P1, K1 tbl) 2 times, YO, (K1 tbl, P1) 3 times, K2tog tbl

Round 17: (P1, K1 tbl) 2 times, P1, YO, (K1 tbl, P1) 2 times, K1 tbl, K2tog tbl

Round 18: (P1, K1 tbl) 3 times, YO, (K1 tbl, P1) 2 times, K2tog tbl

Round 19: (P1, K1 tbl) 3 times, P1, YO, K1 tbl, P1, K1 tbl, K2tog tbl

Round 20: (P1, K1 tbl) 4 times, YO, K1 tbl, P1, K2tog tbl

Round 21: (P1, K1 tbl) 4 times, P1, YO, K1 tbl, K2tog tbl

Round 22: (P1, K1 tbl) 5 times, YO, K2tog tbl

Chart B

Round 1: *(K1 tbl, P1) 5 times, K2tog tbl, YO, repeat from *, (K1 tbl, P1) 5 times, Sl 2, Place sl sts back on left needle, K3tog tbl, YO

Round 2: *(K1 tbl, P1) 4 times, K1 tbl, K2tog tbl, P1, YO, repeat twice more from *

Round 3: *(K1 tbl, P1) 4 times, k2tog tbl, P1, K1 tbl, YO, repeat twice more from *

Round 4: *(K1 tbl, P1) 3 times, K1 tbl, K2tog tbl, P1, K1 tbl, P1, YO, repeat twice more from *

Round 5: *(K1 tbl, P1) 3 times, K2tog tbl, (P1, K tbl) 2 times, YO, repeat twice more from *

Round 6: YO, *(K1 tbl, P1) 2 times, K1 tbl, K2tog tbl, (P1, K1 tbl) 2 times, P1, YO, repeat from *, (K1 tbl, P1) 2 times, K1 tbl, K2tog tbl, (P1, K1 tbl) 2 times, P1

Round 7: K 1 tbl, YO, *(K1 tbl, P1) 2 times, K2tog tbl, (P1, K1 tbl) 3 times, YO, repeat from *, (K1 tbl, P1) 2 times, K2tog tbl, (P1, K1 tbl) 2 times, P1

Round 8: K1 tbl, P1, YO, *K1 tbl, P1, K1 tbl, K2tog tbl, (P1, K1 tbl) 3 times, P1, YO, repeat from *, K1 tbl, P1, K1 tbl, K2tog tbl, (P1, K1 tbl) 2 times, P1
Round 9: K1 tbl, P1, K1 tbl, YO, *K1 tbl, P1, K2tog tbl, (P1, K1 tbl) 4 times, YO, repeat from *, K1 tbl, P1, K2tog tbl, (P1, K1 tbl) 2 times, P1

Round 10: (K1 tbl, P1) 2 times, YO, *K1 tbl, K2tog tbl, (P1, K1 tbl) 4 times, P1, YO, repeat from *, K1 tbl, K2tog tbl, (P1, K1 tbl) 2 times, P1

Round 11: (K1 tbl, P1) 2 times, K1 tbl, YO, *K2tog tbl, (P1, K1 tbl) 5 times, YO, repeat from *, K2tog tbl, (P1, K1 tbl) 2 times, P1

Round 12: (K1 tbl, P1) 2 times, K2tog tbl, *YO, (K1 tbl, P1) 5 times, K2tog tbl, repeat from *, YO, (K1 tbl, P1) 3 times

Round 13: K1 tbl, P1, K1 tbl, K2tog tbl, *P1, YO, (K1 tbl, P1) 4 times, K1 tbl, K2tog tbl, repeat from *, P1, YO, (K1 tbl, P1) 3 times

Round 14: K1 tbl, P1, K2tog tbl, *P1, K1 tbl, YO, (K1 tbl, P1) 4 times, K2tog tbl, repeat from *, P1, K1 tbl, YO, (K1 tbl, P1) 3 times

Round 15: K1 tbl, K2tog tbl, *P1, K1 tbl, P1, YO, (K1 tbl, P1) 3 times, K1 tbl, K2tog tbl, repeat from *, P1, K1 tbl, P1, YO, (K1 tbl, P1) 3 times

Round 16: K2tog tbl, *(P1, K1 tbl) 2 times, YO, (K1 tbl, P1) 3 times, K2tog tbl, repeat from *, (P1, K1 tbl) 2 times, YO, (K1 tbl, P1) 3 times

Round 17: K1 tbl, *(P1, K1 tbl) 2 times, P1, YO, (K1 tbl, P1) 2 times, K1 tbl, K2tog tbl, repeat from *, (P1, K1 tbl) 2 times, P1, YO, (K1 tbl, P1) 3 times

Round 18: K1 tbl, *(P1, K1 tbl) 3 times, YO, (K1 tbl, P1) 2 times, K2tog tbl, repeat twice more from *

Round 19: K1 tbl, *(P1, K1 tbl) 3 times, P1, YO, K1 tbl, P1, K1 tbl, K2tog tbl, repeat twice more from *

Round 20: K1 tbl, *(P1, K1 tbl) 4 times, YO, K1 tbl, P1, K2tog tbl, repeat twice more from *

Round 21: K1 tbl, *(P1, K1 tbl) 4 times, P1, YO, K1 tbl, K2tog tbl, repeat twice more from *

Round 22: K1 tbl, *(P1, K1 tbl) 5 times, YO, K2tog tbl, repeat twice more from *


Wednesday, January 21, 2009

Need a great story for bedtime tonight?

Photo courtesy of YlvaS

I just finished reading this story aloud to the children as we cozied under a blanket. It is a hilarious story for everyone, but it is a must read if you have boys! You know you have a living story on your hands when adults' and children's imaginations all run wild. :)

Boys and Girls are Different

Here is some recently shared wisdom from my three-year-old:

Boys have a peanut. Girls have a china.

Just in case you didn't know.

Tuesday, January 20, 2009

The Art of Being 'On Time'

Photo courtesy of laffy4k

This is definitely a learned art, except for those few very lucky people to whom it seems to come naturally.
It does not come naturally to me, though I am learning. I think the biggest secret is I have come to accept the reality that, left to my own devices, I have no realistic concept of time. My husband, on the other hand, is always on time. He gets to places nice and early, with time to get a coffee if he wants or just get into his meeting, help set up chairs, and take off his coat. We have been married nearly 18 years and it was only about two years ago that I decided he might actually have something to teach me.

I watched him for awhile and realized that he started getting ready to go WAY before the idea would have ever even occurred to me. If he is going to hockey after the kids are in bed, he will start getting his hockey stuff together after work. When leaving for church on Sundays, he will suggest getting the kids' coats on at least 10 minutes before I would have started. He is either one of those lucky people who have a built-in realistic clock or he has learned the art of being on time.

As someone without a realistic internal clock, here is what I do:
First of all, I listen to Steve if he says we have to get ready at a particular time. I used to always disagree, saying, "Oh, we don't have to leave then. We don't want to be too early." HUH?! Why not? And, was this ever really a problem for me, anyway? Nope.

Second, I take a couple of minutes to make a realistic mini-schedule for myself. This is a little secret that has helped me immensely in the art of being on time. Yesterday, we had homeschool skating as we do every week. I took out a little scrap of paper and wrote the time skating begins and the kids have to be on the ice. Next, I wrote when we wanted to arrive at the arena. Then, I worked backwards writing the things we had to do to get ready to go and assigning lots of time to each thing. Here's how it turned out:
  • 11:10am Heat up soup
  • 11:15am Pack Car
  • 11:25am Eat Lunch
  • 12:15pm Get outerwear on and get out to car
  • 12:45pm Arrive at Art Store (I had an errand)
  • 1:10pm Arrive at rink
  • 1:30pm Skating starts
We arrived on time and the kids were ready to go when they needed to be. The great thing about making a mini-schedule is that there are all kinds of little checks in place to keep you on track. It is hard to remember that it takes a long time to get several children ready to go, especially in the winter.

Well, I'd better go take my own advice. We have a very busy week and we need to get ready to go!

Monday, January 19, 2009

Home Blessing as a Family: Step Two

Photo courtesy of merwing

I am re-vamping our Home Blessing schedule and assignments. If you would like to join me, please head over to my first post on the topic for your first step.

If you worked alongside me, you will now have your room-by-room task lists completed. Were you as surprised as I was how many little jobs there are needing to be done? I think I need to get myself some more kids!

The next step is deciding how often you would like to have each task done. I suggest you assign the frequency of the tasks according to your realistic ideals. So, dream a little, but don't be silly. An organized home is a blessing, but there is more to life than housework.

I am going to take my notebook and simply note beside each task one of the following:
  • D - for daily
  • EOD - for every other day
  • W - for weekly
  • BW- for bi weekly
  • M - for monthly
  • EOM - for every other month (my 14 year old is reading over my shoulder and groaned when I wanted to put 'BM' for bi-monthly)

If a task needs to be done less frequently than every other month, I would consider that to be different than the regular maintenance tasks we are scheduling here and would take it off the list.

After making the above notes, I am going to enter the tasks into the computer in an Excel spreadsheet to make things easier for the next step. My next post on Home Blessing as a Family will be about that. :)

Sunday, January 18, 2009

Charlotte Mason Basics: Composition

I don't want to sound like a broken record, but...once again, Charlotte Mason's method for this subject is simple, effective and natural. Charlotte's students learned composition by continually reading living books and narrating what they had read.

Throughout history, one of the most effective and most common ways people acquired skills was to apprentice. In an apprentice relationship, the apprentice works alongside the master craftsman, assisting him in his work, all the while learning the life skills necessary to one day continue on his own as a master craftsman himself. The apprentice does real work while he gains an understanding of the art and practical skills his master shares with him.

Narration, the simple retelling of what a child has read or heard read, is composition. In effect, the children are the apprentices of master craftsmen like Charles Dickens, Thornton Burgess, Beatrix Potter, and C. S. Lewis. The children study directly under the authors (by reading their works), learning their style, paying close attention to the way each author weaves a story together, the vocabulary they use, the structure of their sentences. They learn what sound right and what doesn't. They learn when to use colourful descriptions and how to make use of quotations. The best part is they learn it all simply by performing the most enjoyable of tasks -- retelling the story they have read.

In Charlotte's schools, the children narrated orally beginning at age 6. Continuing with oral narration, written narration was added at about age 10. Formal and specific teaching in 'essay-style' writing was not added until age 14 and was fairly minimal. Charlotte found that when children were experienced in oral and written composition through narration, the skills of learning essay writing were very simple. I have also found this to be true. With my 14 year old daughter this year, the teaching of essay writing was essentially a one-afternoon task. It was so simple because she had long-ago learned the art of effective composition and storytelling. Describing and implementing the essay format was very basic and she picked it up effortlessly.

A word about beginning written composition/narration: for the first couple of years, I encourage you to allow your child to just write without giving them any rules to follow. Let the flow of their writing develop without their feeling hampered by trying to remember to vary the length of their sentences, to use quotation marks in just the right spots, etc. I like to help our children make a 'good copy' of their written narrations later on. This is eased by the use of the computer, which makes correcting a simple task. In our family, I have our children do a combination of handwritten and typed narrations.

We are conditioned to think that to truly learn something, it must in the boring format of: memorizing a formula with lots of rules and applying them in workbook/test format. Anything else seems almost a bit of a gamble. In reality, though, how many of us would be operated on by a surgeon who had never worked directly under another surgeon? What about having your house wired by an electrician who had never actually seen anyone do proper wiring? The real gamble, then, is to assume our children can ever learn to write effectively without studying under master writers.

Karen Andreola, in The Charlotte Mason Companion, says that Charlotte's method of learning composition is so simple that it feels as if we are cheating. That is music to this hard-working, homeschooing mom's ears.

Saturday, January 17, 2009

Made up and ready to go!

I have loved make-up since I was thirteen. I remember being on a grade 8 school trip to our nation's capital, Ottawa. I had $40 of babysitting money all to myself to spend anyway I wanted. Our chaperones let us loose in the mall (???) and a friend and I headed for the nearest drugstore where I blew all $40 on a bunch of CoverGirl. I never looked back.

Each day, I would faithfully rise early and spend about an hour or an hour and a half doing my hair and make up. In 9th grade, it took a long time to get that ridiculous poof of bangs just right on the top of my head. Of course, at lunch hour, I would also need to head to the bathroom to 'refresh' my hair and makeup. Fortunately, I had an extra stash of makeup and a butane curling iron in my locker.

Nowdays, my make up routine is much simpler and I have graduated beyond CoverGirl. Sometimes my routine is non-existent, but I admit that I do feel great when I have put on a bit of make up and done my hair a little. (I don't do the poof anymore, though.)

If you are a mama who likes make-up, I thought you might enjoy this great post on applying mascara. I enjoy reading the Elsa Beauty blog and I found her post particularly helpful.

Friday, January 16, 2009

Charlotte Mason Basics in the Real Life Home

...means that I do what I can, but sometimes I can't post as I've planned. Today was a very full day and I didn't get to prepare my post as I'd hoped. I will do my best to get it posted this weekend. I do have a post scheduled for tomorrow, but it isn't Charlotte Mason-y at all. :)

Thanks for your patience! You are all very important to me and I truly appreciate your time and your reading my blog so faithfully. :)

Thursday, January 15, 2009

Quiet Time Challenge Check-In

How is everyone doing on their quiet time? I almost decided to miss mine a couple of nights ago when it was quite late, baby guy was still awake and I was pretty tired. However, I decided I would just read one chapter of the Bible (which is my normal amount) and pray for a few minutes with baby guy crawling around at my feet. I was so glad that I did. It reminded me that something is better than nothing. Sometimes I have a lot to give and sometimes I don't, but I'm going to do my best to give what I have...and I will try to slot it in earlier in the day, too!

I'm looking forward to covering teaching composition tomorrow as we continue our series on Charlotte Mason Basics.

Also, for those of you following along on the Home Blessing as a Family plan, make sure to have your room-by-room cleaning task lists ready for the next step on Monday. There is a sample here if you need some inspiration.

Oatmeal for Breakfast...AGAIN?!?!

Photo courtesy of Kristin Brenemen

We have oatmeal a lot for breakfast in the winter. I generally make steel cut oats and I try to make them interesting sometimes by adding home canned fruit or apples and cinnamon. By this time of year though, I am hearing a bit of grumbling - and it isn't their hungry tummies.

However, I will not give in and buy cold breakfast cereal. I buy high-quality cold cereal occasionally in the summer, though I always prefer homemade granola. In the winter, though, it isn't happening. This morning, I came across a post at Robin's Heart of Wisdom/Heart at Home blog, which includes a huge list of toppings to spruce up oatmeal. Today is egg day at our house, but you can bet that tomorrow morning, I will be making jazzed up oatmeal!

Editing to add that I am not into all the 'low fat' and 'non fat' things she recommends. We will use this list as a stepping stone and substitute in the whole foods versions (or just skip some of the suggestions). Fat soluble vitamins, A, D, E and K, cannot be absorbed without fat. We, of course, don't microwave our oatmeal, either!

Wednesday, January 14, 2009

The Faithful Home Helper

You have never met a more faithful or dedicated 10 month old baby. It amazes me how he searches out jobs that need to be done and does them. For example, we have a large bookshelf on our main floor that houses all the books we are currently using for homeschooling. Each day, several times, my baby guy will -- without being asked -- clear off all the shelves for us - faithfully cleaning them off so that they are spic and span. Also, we have a shoe shelf in our entranceway where everyone has a particular spot for their shoes. Baby guy will take the initiative once a day to clear off the whole shelf. It amazes me how tidy he likes the shelves to be.

Other examples? If there is anything placed on the coffee table, he is right on it. He clears it off for us in a flash. He is also very fond of making sure any baskets or bins are cleaned right out. If he comes across a bin with something in it, he will give it a quick turn over to make sure it is free and clear of any clutter. I only wish we could all be so motivated to keep things as tidy as he does.

He even likes to get involved in the daily table jobs. Three times a day, after each meal, it is my 10 year old son's job to vacuum under the table. No matter where baby guy is, no matter what he is doing, he will always drop everything to come right over and unplug the central vac again and again for us while the vacuuming is being done. No one asks him. He comes just like that. Isn't it amazing?!

Tuesday, January 13, 2009

Sewing + Knitting = Sewing for my Knitting!


What could be better?!

I made a few of these bags to keep my WIPs (works-in-progress) organized. It makes it easy to toss a project into a bag and also easy to leave a project lying around without my baby terrorizing it. However, this bag would work for anytime you'd like to be able to quickly identify or label the contents inside.

This is simply a basic drawstring bag with a toggle and a clear window. I was too lazy and cheap to go to the fabric store for some vinyl for the window, so I started scrounging around the house to find something suitable. I came across a clear zipper bag that our sofa cover came in. I found that it had a totally unnecessary pocket inside, so I cut it out. (Actually, I ripped it because, again, I was too lazy to go get the scissors.) It was enough to make about a half dozen little identification windows.

I cut a piece of the vinyl about 2 x 3"...

Interruption: OH MY GOSH! You should see how much my sweet little baby is walking right this very minute!! Very exciting. I knew he was advanced. ;)

...and then I turned one short edge under just a little and topstitched. After that, all that was necessary was to topstitch the remaining three sides to the bag where I wanted the I.D. pocket to go. It was a cinch.

Sunday, January 11, 2009

Socks for my Big Guy

...as opposed to for my man or for my baby guy. ;)

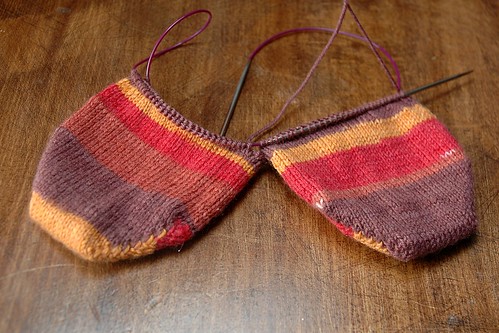
My 10 year old son picked this yarn from my stash. I'm glad I asked him, as I had purchased some more boring guy-type plain colours and I thought he would have picked one of them, but he went for seriously snazzy. The pattern I used was Toe Up Jaywalkers. I did like the pattern, but I didn't believe I had to keep my gauge to the suggested and that got me into trouble. I normally knit a smidge tighter than suggested, as I like my socks to fit snuggly. With this pattern, though, it is not very stretchy at all, so you need to knit as written. My son can just barely get them over his instep! Oops! He certianly won't need the extra length I knit into them.

Here they are in all their colourful glory:


I'm now working on some plain vanilla (meaning just plain old knit -- though I'll probably rib the legs) socks for me and they are knitting up extremely quickly.


Sigh. I love knitting.

Saturday, January 10, 2009

Professional Development for Homeschooling Moms

I heard an excellent tip on professional development for homeschooling moms which I would like to share with you. At the beginning of our homeschool journey, we are often very excited and will gobble up any books we can get our hands-on about homeschooling. Over the years, we can easily allow our freshness to wear off as we become familiar with homeschooling and settle comfortably into our routine. The recommendation I heard was to purchase (and read!) one book each year on homeschooling philosophy, something which will give you fresh vision, a new perspective and a few exciting ideas.

Each year at my local homeschooling conference, I select one book which I think will inspire and encourage me. If you are interested in Charlotte Mason's philosophy, you might consider purchasing one of the books from yesterday's list. I am also partial to the Clarksons' books. Particularly Sally's books on mothering are wonderfully inspiring. I have been continually blessed by adopting this idea of professional development. Making sure that we, as homeschooling parents, are kept fresh ensures that we will have the fuel to keep our 'vehicles' running when the road is bumpy.

I hope you have a wonderful, refreshing weekend. :)

Friday, January 9, 2009

Charlotte Mason Basics: Resources for Parents

It is such a pleasure to be a homeschooler in these days. We have a wealth of information and resources available to us. If we search any subject we are interested in, our search will turn up a relatively large selection of books and websites. Recently, Charlotte Mason has gained popularity, as parents search out a style of education that is natural, enjoyable and simple. As a result, books on using the Charlotte Mason approach in the modern homeschool have been written in recent years.

I thought I would kick the year off by suggesting a few print resources you might wish to look at if you are interested in learning more about Charlotte Mason's style of home education.

Charlotte Mason's Original Homeschooling Series: This is a meaty set of books that will give you the benefit of Charlotte's own thoughts on education. There are six volumes in her set. They are also available free online in their original language or in an updated, modern language, which some find more readable.

A Charlotte Mason Companion by Karen Andreola: A wonderfully written and illustrated, large - but not intimidating manual covering just about every facet of Charlotte Mason's style. The author has an obvious passion for this style and is a lovely, experienced homeschooling mother. (She is responsible for the republishing of Charlotte's works.)

Charlotte Mason Education: A How-to Manual by Catherine Levison: This is a quickly-read, crash-course in Charlotte Mason's style. Catherine does a lovely job of making the simplicity of Charlotte's style shine through.

More Charlotte Mason Education: A Homeschooling How-to Manual
by Catherine Levison: A follow-up to the previous book, this one takes the reader further into some of the practical logistics, such as planning and scheduling, high school, and making a book of centuries.

When Children Love to Learn: A Practical Application of Charlotte Mason's Philosophy for Today by Elaine Cooper et. al.: This is my all-time favourite book on Charlotte Mason education. It is intensely readable, combining enough philosophy to empower the reader with a thorough understanding of the 'whys' behind the method with loads of practical suggestions for application in just about every subject.

Charlotte Mason Study Guide by Penny Gardner: This book is designed to deepen your understanding of Charlotte's Original works, but is most certainly also a stand alone book. Penny also has an excellent website.

For the Children's Sake by Susan Schaeffer Macaulay: One of the first books written on Charlotte Mason, this is also a great one to start with. It is a gentle introduction which I find inspiring and soothing. Oddly enough, the first time I read it, I didn't like it at all. When I finally decided to return to it after learning more about Charlotte Mason, I thoroughly enjoyed it. Later on, our Charlotte Mason study group decided to study it and I read it a third time. This time I loved it.

Educating the Wholehearted Child by Clay and Sally Clarkson: Anything the Clarkson's write is wonderful and this book is no exception. I just love it. I think the big strength of the Clarksons' books is that they offer incredibly inspiring vision, but still seem 'real'.


Thursday, January 8, 2009

"Mommy? I'm scared,": Legit or sham?

Any parent of a child old enough to talk has probably just drifted off to sleep, desperate for a few hours of much needed respite, only to be wakened by little (or big) feet padding down the hall, a little hand opening the door and a little voice saying, "Mommy? I'm scared." Different families will handle these inevitable times in vastly different ways according to each family's needs and beliefs. I thought I might share how we handle things in our family.

First of all, Steve and I practice attachment parenting. While the practical working out of this differs from family to family, it is essentially recognizing the crucial importance of helping each child to form a secure bond with her parents. One way we see this at work is through nighttime parenting. Attachment parenting recognizes that our job as parents does not end at night. Children have nighttime needs as well as daytime ones and those needs are equally important.

However, moms and dads have needs, too. Moms and Dads need sleep and need time alone together. It is not easy, but it is possible to make sure everyone's needs are met.

In our family, we keep our babies nice and close until I have nightweaned them (at about a year old) and they are sleeping through the night reliably (12-18 months?). After that, they are moved in with a sibling, but they still continue to 'visit' us now and then -- sometimes a lot of 'now and then'! If we have no current baby in with us and the child is still little (say, under two or so), they are free to just climb into our big bed. Otherwise, they can visit the quilt basket:


This basket stays under my dresser and contains two quilts and one waterproof, flannel-topped pad. If the child has any possibility of wetting at night and isn't in diapers, they/we put down the pad. Then, they can grab a quilt and rest securely beside our bed. The philosophy behind this arrangement is that it meets our children's need for security (to be comforted by Mom and Dad's presence) without making it too comfy and encouraging them to visit when they aren't legitimately scared. Sure, they'd love to sleep with us all the time, but they have each other. :)

(Just for interest's sake, the two quilts are large 'crib-sized'. One was made by a friend of mine for my older son when he was born and the other one, I made myself! It is the only quilt I ever did and it is from the book, Bend the Rules Sewing by Amy Karol.)

What about your family? How do you handle nighttime visitors?

Wednesday, January 7, 2009

Knitting Evangelism


Can I let you in on a secret? I hate relaxing. I know that sounds insane, but it is true. I find relaxing very unrelaxing. Just sitting there drives me crazy. After I have a baby, I manage to spend the first day in bed with the new baby because the midwives pretty much force me to. The next day, I sit on the couch downstairs in my p.j.s and after that, I just can't stand it anymore and I get up and get dressed and start back into life. Knitting has been my sanity saver during forced 'relaxation'. I didn't realize how much I would love it when I first started learning about 2 years ago.

Why do I love knitting?
  • it is productive
  • the finished projects can be very useful
  • I can still be 'social' when knitting
  • it is very portable, unlike my other favourite hobby - sewing
  • I can pick it up and put it down easily
  • it makes me feel smart!
  • it is not overly costly
  • it is beautiful
As you know, socks are my favourite thing to knit, probably because no matter how fast I knit them, we can never have too many. They are such a useful, luxurious and beautiful thing to make. Contrary to popular belief, they are not hard at all. I started my first pair of socks about two weeks after I started knitting.

Lots of people start knitting by making a scarf. If you are thinking of learning to knit, I would encourage you to consider making a dishcloth for your first project. The yarn costs very little, the dishcloth is immediately useful and, therefore, gives you the instant gratification you need to get you excited about your new hobby. There is a terrific yahoogroup called, Monthly Dishcloths. Twice a month, the list owner will e-mail out about 9 or 10 lines of a simple pattern everyday for about 5 days and everyone knits the dishcloths together. The first pattern of the month is a seasonal picture and the second one is a repeating pattern with a new 'stitch' to learn. Both are perfect for learning to knit, as you can practice your skills on something that doesn't need to have a specific gauge. The picture above is the dishcloth we just finished. (It is a skate, if you can't tell!!) It used only knit and purl stitches, perfect for the beginning knitter. And, knitted dishcloths are wonderful to use.

Tuesday, January 6, 2009

When Quiet Time is just Quiet Time

Today as I sat down to have my quiet time, there were a number of distractions. I normally have my quiet time earlier in the day, but today it didn't work out until later. Steve was putting the kids to bed and our 3 year old's pillow was missing. Don't ask me how a child can misplace a pillow. Anyway, there was quite a kerfuffle over it and I found it hard to concentrate. I was also at the place in my Bible reading where I read Philemon. I wasn't feeling very connected to the scripture, though, of course, I see value in reading it regardless of how I feel. I started to pray, but I didn't feel like I had much to say. So, I just sat for a few minutes. God was silent and I was silent. That's okay. In fact, it is kind of refreshing. Every time I sit down to spend time alone with God doesn't have to involve His revealing new meaning in a particular scripture or my unloading a whole bunch of requests. Sometimes, it is just quiet.

I must admit that I like the really snazzy, inspiring times a lot, but God doesn't work that way all the time. We need a breather sometimes, a time to let the lessons and ideas of other days sink in and take hold. For today, I just ended my quiet time by listing all the little, mundane things I was thankful for, the things I don't often take the time to appreciate.

I'm off to paint my bathroom, now. My dear mother-in-law primed and put the first coat on earlier. It was a fairly hideous yellow-green before and is now a beautiful, soothing and sophisticated 'Papineau'.

Monday, January 5, 2009

Home Blessing as a Family - First Day's Chore Lists

Done! Earlier today, I blogged about my new plan to revamp our Home Blessing system. It starts with listing all the chores that need to be done in a particular room, one room per day. I actually chose two areas today since I was just sitting watching my pathetic, sick, 5 year old daughter be soothed by a warm bath. Naturally, I listed the chores for the bathroom I was in and I also did the hallway/stairs just outside the bathroom. It is definitely essential to be able to see the area for which you are making the chore list.

I thought the lists would be very short. I was surprised to see how many individual jobs there are to be done. Here are my lists:

Upstairs Bathroom
  • wipe counter and back of toilet
  • empty garbage
  • wash shower curtain
  • wash bathmats
  • vacuum/sweep floor
  • clean sink
  • clean/shine faucets
  • clean mirror
  • clean soapdish
  • clean toilet inside and outside
  • check floor for clutter
  • change handtowel
  • clean tub/faucets/showerhead
  • wipe shower walls
  • clean window
  • sweep cobwebs
  • dust medicine cabinet/baseboard heater/candle
  • wipe baseboards
  • wipe down walls
Upstairs Hall/Stairs
  • sweep cobwebs
  • wipe walls/baseboards
  • wipe doorknobs/light switches
  • vacuum
  • check for clutter
  • dust pictures
  • wash window
  • wipe window ledge
WHEW! It makes me tired just listing everything. Good thing I have so many little workers!

Home Blessing as a Family

Photo courtesy of Geekgirly

I love the term 'home blessing' coined by the FlyLady. I think that it truly depicts what it is we are doing when we are cleaning our dwelling. More accurately, we could call it 'family blessing', but that sounds like someone is preggers. ;) We are not merely 'doing chores'. Rather, we are taking an opportunity to serve one another and to serve alongside one another as we maintain our home. We are, in effect, washing one another's feet.

Anyway, I realized recently that my plan for home blessing needed some improvement. Now that I have several children who can help out in a significant way, I need to re-vamp our system and outline more exact specifications for each job so that everyone isn't floundering wondering what they should be doing during home blessing time.

I have a plan which will leave me with the specifics I need to assign tasks to everyone on an age-appropriate basis. Care to join me? Let's get started:

  1. Grab a small notebook and a pen.
  2. Each day choose one room of your home to focus on -- not to clean, but just to plan for.
  3. List all the cleaning chores you can think of that need to be done as regular maintenance for that room. Look at walls, floors, horizontal surfaces. At this point, you don't need to decide when or how often to do the tasks or who will do them. Just list them for now.
I'll give you (and me!) two weeks to finish up this task and then we'll move on to the next phase.

Sunday, January 4, 2009

Stylin' in the Kitchen

I don't always post pictures of my crafts because:
  1. sometimes it is embarrassing how many I do
  2. this isn't specifically a crafty blog and non-crafters might get bored
However, I thought everyone might appreciate this lovely apron. I bought this pattern 10 months ago, just before my youngest baby was born. I thought I'd make it before his birth, but I just managed to get to it yesterday. I also made my sister an apron for her birthday earlier in December and I 'winged' one inspired by the pattern for my 7 year old daughter for Christmas.

The pattern is called, Emmeline published by SewLiberated. I really like it because it is so non-aprony and will actually make me feel dressed up a bit when I am just wearing my regular stay-at-home clothes. Shallow or not, I find that looking nice always raises my spirits a little. :)

Here is my new apron!


And, it is reversible!! This is actually my favourite side.


This is the one I made for my daughter for Christmas. She is such a lovely, willing helper in the kitchen that I thought it would be fun if we could match. She says I can wear the pink side of mine when we are working together and the other side when I am working alone. :)


Do you have a favourite apron? I'd love to hear about it, if you do!

Thursday, January 1, 2009

A New Year's 31-Day Challenge for Christian Mamas

Photo Courtesy of amanky

Happy New Year! Did you stay up to ring it in? Like most years, I sort of did. I do try for the sake of my husband and the children who are old enough to care, but it just is not terribly exciting for me and I usually fall asleep. :)

Sometimes I make New Year's Resolutions, but mostly I don't. I think I am afraid of failure. If you read the statistics, though, New Year's Resolutions are actually very effective in comparison with the things people resolve to do at other times on their own.

Over the past couple of months, I have been addressing my sporadic quiet time and trying to figure out why I am not more consistent than a few times a week. I think it is a couple of things. Firstly, I think I believe I am too busy. Secondly, I think I don't realize how much it matters. Are you like me at all?

"I'm too busy." Of course, I know I am never too busy for God, that He is my most important priority, etc. However, on a practical basis, when I have 1 hour to be out of the house and I still have to dress children, have a shower and scrape the ice off the car, I believe I can't 'fit it in'. Over the last couple of months, I have played a little game with God. I said to Him, "I know you are the most important priority in my life. You are more important than a shower or eating breakfast, but these things are still important. I am going to choose to put you first and I will trust that you will help me to get everything done that needs to be done." I didn't have ridiculous expectations of sitting in my room absorbed in worship and prayer for the full hour or anything, but I did need a few minutes to read God's Word and to talk to him and sit with him. In the many times I have tried this, God has never let me leave the house in my pyjamas or without eating.

"I don't realize how much it matters." I think, in my human state, this will always be somewhat true. I don't think I am capable of truly understanding the importance of my relationship with God, but I can try! For the month of January, I am going to trust God to show me what a month of consistently spending time with Him everyday will mean to my life. I am hoping some of you will join me, so you can share your stories of encouragement with me, too.

So, the challenge is to spend just a few minutes praying and reading God's Word for the next 31 days - every day. Please don't feel you have to set aside a half hour or to get up at 5:30am, if this isn't going to work for you. Let's stretch ourselves, but also be realistic. If you are not already having quiet time consistently every day, then anything will be better than nothing. Start very small. I know God will bless any efforts we make with a whole heart. Reading a few verses and praying for five minutes is worthwhile. Don't let the belief that you should be doing more rob you of spending time with our Lord.

If you would like to join me, leave a comment on this post. I will update my progress on a little sidebar. I can't wait to see what the Lord will do!