Showing posts with label food. Show all posts
Showing posts with label food. Show all posts
Tuesday, May 12, 2009
Defining Real Food

I don't really trust anyone in the "food" industry to tell me what is and isn't a real food. They are constantly changing what they say is healthy and important to eat. While I find the idea of 'superfoods' very annoying and trendy, I do think they are an improvement over the idea that we can somehow make up for an unhealthy diet by taking artificial supplements. If we truly cannot get what we need to live from our foods then something is terribly wrong with our food supply.
And, I think that is definitely the case. However, that is not what I wanted to talk about today.
Like you, I live in the real world, too. I don't have a two acre, bio-dynamic organic garden from which I can pick everything we eat. I don't have a farm that houses a small number of harmonious animals living out a life of country bliss until the day that their lives are ended (in a humane way) so that our family can have meat we know comes from an animal who has been treated ethically. We don't milk our own cows, collect our own eggs or dry our own salt. I don't make cheese or have summer sausage curing in a shed somewhere.
But I could, if I really wanted to.
That is my definition of real food. Even if it is not prepared by me, I think real food is something I could make myself at home if I really wanted to. For example, I could skim cream off the top of a pail of milk and make whipped cream. I could not make the chemicals and do whatever it is they do to make 'whipped topping', however. (I also could not add all the preservatives and other weird ingredients they add to most creams, so I look for whipping cream that lists 'cream' as the only ingredient.) While I could skim the milk, I could not homogenize it. I also would not skim the milk, throw away the cream and drink the milk skimmed.
I could, if I really wanted to, slaughter a chicken, remove feathers and -- gulp -- the beak, feet and insides and roast the bird for dinner. I could not, however, make a typical chicken nugget. And, I would not slaughter our family's chicken, cut out the two breasts, bone and skin them and throw out the rest of the chicken!! I could churn butter. I could not make margarine. I could make lard. I could not make hydrogenated vegetable oil. I could pick, dry and roast coffee beans (cheers go up from my readers!). I could not make solvent to add to make the beans decaf. I could, however, perform the 'swiss water process', if I really wanted to.
I think it is particularly important to keep these ideas in mind when you are shopping at a natural foods store. I love our local natural foods store and my natural foods buying co-op. However, they do contain lots of factory-made foods. Yes, I could make whole grain pasta and cheese sauce with whole ingredients. No, I could not make whole foods into powdered cheese sauce. Just because something started out with quinoa or organic navy beans does not mean it goes into your body in a whole foods form. It is easy to spend a whole lot of money on foods that, while slightly better than their grocery store counterparts, are really of low nutritional value.
I don't always follow my own philosophy perfectly and I don't always know how everything is made, so I can't always say if I could do it myself at home or not. I just try to keep my philosophy in mind when I shop and do what I can. I don't stress the rest.

Tuesday, March 31, 2009
The pros and cons of the homeschool lunch
 This was today's lunch. Nutty Nut Butter & Jam sandwiches, some home-canned fruit and local fresh veggies.
Pro: I don't have to try to make a whole bunch of lunches the night before. The hurdle of trying to dream up and prepare a host of interesting and nutritious things has caused even the most health-conscious mom to abandon her principles and start buying little packages which are slyly oh-so-convenient to 'toss in a lunch'.
Con: I still have to try to dream up something interesting and nutritious for lunch everyday. (I'm not one of those cool moms who makes faces on her kids sandwiches with veggies, either.) I need to make it in a large quantity and have it ready fairly quickly to leave room for the other things we want to do.
I find it really challenging to come up with good ideas that are healthy, not too expensive, involve real food and can be made fairly quickly. I thought I would share with you a few ideas I serve that meet the above criteria, in hopes that it will entice you to share your ideas with me. :)
A mainstay in our homeschool, my number one lunch idea is 'snack lunch'. An ingenious phrase coined by my mom during my own childhood, it instantly becomes fun to be served a bunch of unconnected, though nutritious foods. If you are a really cool mom, you can serve this lunch in muffin/mini muffin tins with different things in the cups. (Unfortunately, again, I'm not this type of mom.) It drives me a bit crazy to chop up and prepare all these things, but several of our children love to do so. Ideas for snack lunch include:
- chopped fresh fruit and veggies (avocado is great to serve with snack lunch)
- (or just put out a bowl of apples)
- cheese - cubed or sliced
- crackers
- summer sausage pieces
- nuts
- dried or canned fruit
- hard-boiled eggs
- my oldest daughter, our main snack-lunch maker, often makes us deviled eggs
- pickles
- a healthy milkshake or fruit smoothie will round things out if you don't have much food in the house
- hummus
We also have sandwiches a lot, particulary peanut butter and jam. They are healthy and inexpensive, though they can get a bit boring if you overdo it. If you are using natural peanut butter (just peanuts), you may find like I do that the sandwiches can be a bit 'dry'. I have discovered that buttering the bread before putting on the peanut butter makes a world of difference. While we are on the subject of natural peanut butter tips...when I open a new container of peanut butter, I scrape the entire thing into my mixer bowl, attach the 'cookie' paddle and mix it up on stir speed for a minute or so to get everything homogenized again. I find if I do this, it will not usually separate again before we use up the container. (Also, I never keep it in the fridge, as recommended, but we go through it pretty quickly.)
Today, I made some great sandwiches, if I do say so myself. A few summers ago, when camping near Ithaca, NY, we visited the Moosewood Restaurant and one of our children ordered (if you can believe it) nut butter, bread and fruit. The nut butter was fantastic. I can't remember exactly what it was, but I was inspired to jazz up our own peanut butter at home. So, I invented the 'recipe' below. I didn't actually use any specific quantities when I made it, so I'm guessing here for your sake.
Nutty Nut Butter
- 1 c. natural peanut butter (just peanuts), well-combined
- 1/4 c. almonds, chopped fairly small
- 2 T. sunflower seeds
Preheat oven to 350F. Put nuts and seeds into a cast-iron frying pan and cook until they are nicely toasted, stirring occasionally. You can also do this on the stove burner, if you trust yourself to watch them.
Stir nuts/seeds into peanut butter.
Your turn! What are your healthy lunch ideas?
Tuesday, March 3, 2009
This week's food: CSA and Frozen Foods
Today was our bi-weekly CSA pick-up at Whole Circle Farm. (We pick up weekly in the summer when there are tons of veggies.)

In this pick up, we received:


In this pick up, we received:
- 2 lbs carrots
- 2 lbs potatoes
- 2 lbs rutabagas
- 1 lb onions
- 2 lbs parsnips
- 4 c. dried black beans
- 2 lbs sweet potatoes
- 1 cabbage
- 4 dried chili peppers

- 2 - 2 kg bags of strawberries
- 1 kg pineapple chunks
- 1 kg mango chunks
- 5 lb box of wild blueberries
- 2 L of really good butterscotch ripple ice cream
Monday, March 2, 2009
This week's food: The coconut outlet
I couldn't believe my luck when a couple of years ago, I googled sources for coconut oil and found that there was an outlet that supplied large quantities of very high-quality organic coconut oil within about 20 minutes of my home! I only go about twice a year, but it is very convenient.
Today was my bi-annual trip.

Today was my bi-annual trip.

- 1 gallon of Virgin Coco-Creme Coconut Oil (for times when it will be eaten raw)
- 1 gallon of Fine Organic Coconut Oil (for cooking)
- 1 kg of unsulfured organic dessicated coconut
Saturday, February 28, 2009
This week's food: Farmer's Market, local shops and quick grocery store trip
Saturday is my favourite day of the week. Steve and I have a weekly date morning where we go to the Farmer's Market and then out to the best cafe in...well - maybe in the whole world. :) We also do short errands on Saturday mornings if we have them, such as going to the thrift store or other quick stops.
Today, we went to the market, out for coffee and then to the natural food store and my favourite baking supply shop. Later on, we dropped by the grocery store.
Here is our haul from the Farmer's Market:


Today, we went to the market, out for coffee and then to the natural food store and my favourite baking supply shop. Later on, we dropped by the grocery store.
Here is our haul from the Farmer's Market:

- a large bag of gala apples
- a large bag of pears
- organic broccoli (This isn't local, but sometimes in the winter we are desperate. I like that this is actually a local farm which supplements their income in the winter by bringing in a bit of high-quality organic produce.)
- an organic avocado (ditto to above)
- 1/2 lb black forest ham
- some honey-garlic sausages
- 3 kg. pail of delicious raw honey

- 3 containers of half & half cream for coffee - I like this kind because the ingredients are: (get ready, now...) cream, milk. (Here are the ingredients in the cream we used to get from the grocery store: milk, cream, sodium citrate, sodium phosphate, carrageenan)
- 1 container of sour cream - Guess what's in this? Just cream, bacterial culture. It is actually real cultured sour cream, not something that has been chemically 'soured'.
- a nice big bottle of cod liver oil capsules - this is the only supplement we take on any regular basis. I particularly like it in the winter when we are indoors a lot and aren't eating as wide a variety of foods as we are in the summer. I like it because it is a food supplement, not a faked up one.
 large package of yeast
- unsulfured banana chips
- unsulfured and unsweetened dried pineapple
- unsulfured dried cranberries
- brown sugar


- 10 lbs butter
- I possibly bought some chocolate easter eggs, too, but I can't take a picture of them because someone ate them on the way home.
Wednesday, February 25, 2009
This week's food: Farm and Co-op Order
I thought it might be fun to chronicle the foods our family buys for a week. This doesn't reflect what we actually eat for a week, since I stock up when I shop and we also eat lots of food that I have canned or frozen.
So...without further ado, our first stop is Whole Circle Farm, where I picked up a few things from the farm store as well as our natural foods co-op order. We order from Ontario Natural Foods Co-operative once a month. I have been a member of an ONFC buying club for about 14 years, now. My orders vary widely so that some months I get lots of staples, like dried beans and bulk grains. Sometimes, like this month, there are more convenience foods such as crackers and pastas. (I always order Steve and I a nice chocolate-y treat, too.) While our philosophy is to eat whole foods, we aren't perfect and we do what we can to try to buy fairly high quality when we do get non-whole foods.
I think one important thing in our view of food is that while we eat convenience foods sometimes, like crackers and pasta, we don't convince ourselves that these are as nutritious as whole foods. It is simply not possible to outsmart God. Only He knows why he put foods together the way He did and we can't begin to be smart enough to take them apart, rearrange them and expect to get them better than (or even as good as) He did.
What was in my order this month?

 Photo Courtesy of Brianne G.
So...without further ado, our first stop is Whole Circle Farm, where I picked up a few things from the farm store as well as our natural foods co-op order. We order from Ontario Natural Foods Co-operative once a month. I have been a member of an ONFC buying club for about 14 years, now. My orders vary widely so that some months I get lots of staples, like dried beans and bulk grains. Sometimes, like this month, there are more convenience foods such as crackers and pastas. (I always order Steve and I a nice chocolate-y treat, too.) While our philosophy is to eat whole foods, we aren't perfect and we do what we can to try to buy fairly high quality when we do get non-whole foods.
I think one important thing in our view of food is that while we eat convenience foods sometimes, like crackers and pasta, we don't convince ourselves that these are as nutritious as whole foods. It is simply not possible to outsmart God. Only He knows why he put foods together the way He did and we can't begin to be smart enough to take them apart, rearrange them and expect to get them better than (or even as good as) He did.
What was in my order this month?
 a 25 lb bag of long-grain brown rice
- 4 boxes of nut/rice crackers
- mango-passionfruit herbal tea
- ginger-peach herbal tea
- two packages of firm tofu
- a small block of raw milk parmesan cheese
- a small block of goat's milk feta
- a 1 kg. bag of millet
- a bag of ginger snaps
- a jar of mayonnaise (I like this one because although the oil is still canola, which I am not big on, at least it is expeller-pressed)
- 2 boxes of kamut/quinoa pasta
- 2 boxes of parsley-garlic pasta
- a yummy bar of milk chocolate - fair trade -- just trying to help out...not because I love chocolate or anything. ;)


- 4 dozen eggs
- a package of ground beef
- some pepperoni for pizza night on Friday
 Photo Courtesy of Brianne G.
Thursday, February 19, 2009
Funny food is normal food
 These two carrots are best-buds.
The above picture is one very cool finding from this week. We weren't there to pick up the share this week, so my mom chose out these two carrots, who are obviously very closely connected, knowing our children delight in just this type of thing. I decided to have them finish out their life in the same soup. Oddly enough, the one carrot was just hugging the other one. They came apart fairly easily.
I encourage you, particularly this summer when the fresh, local foods start to be more prolific, to find the joy in 'oddball' fruits and veggies that have been selected and grown for their nutritional value and their taste, as opposed to their ability to travel well and be uniform. It is funny that we have come to associate these latter qualities with 'goodness', while the actual value disappears from our food.
Well, I'm off to eat some split pea soup with fresh bread!
Tuesday, February 17, 2009
Easy and Yummy Breakfast
I am really missing blogging! The truth is that we have been sick constantly for several weeks. It is never anything horrible, but just constanly one person after another with some kind of low-grade sickness. I couldn't believe it when another child woke me up in the middle of the night last night with the sickies. I think it is due to my bragging that our family is almost never sick (which is true).
Anyway, many of us are at least semi-well and I was feeling inspired to serve something different for breakfast. I baked bread yesterday, so we had lots of that to work with. Being too lazy to make French Toast, I decided on a French Toast Strata. I made this up, being inspired from another recipe.

French Toast Strata
makes a full 9 x 13" pan (serves 8, I would say)
1 loaf good whole wheat bread (stale is just fine)
2 c. milk (please use whole milk in your homes - un-homogenized would be preferable)
8 eggs, slightly beaten
1 T. cinnamon
1/8 t. salt
A couple of handfuls of chopped nuts (I used walnuts, but almonds, pecans, or hazelnuts would be tasty, too)
2 apples, sliced (I admit that I peeled mine this time)
Preheat oven to 350 F. Grease a 9 x 13" pan. Cube bread and put half of the cubes into the pan. Sprinkle with the sliced apples and chopped nuts. Top with remaining bread cubes. Combine eggs, milk, salt and cinnamon and drizzle slowly over bread, trying to cover all the cubes. Take the fork you used to mix the eggs/milk and squish down the cubes a little to soak up some more of the liquid. Place in oven for about 35 mins. Serve with maple syrup.
Anyway, many of us are at least semi-well and I was feeling inspired to serve something different for breakfast. I baked bread yesterday, so we had lots of that to work with. Being too lazy to make French Toast, I decided on a French Toast Strata. I made this up, being inspired from another recipe.

French Toast Strata
makes a full 9 x 13" pan (serves 8, I would say)
1 loaf good whole wheat bread (stale is just fine)
2 c. milk (please use whole milk in your homes - un-homogenized would be preferable)
8 eggs, slightly beaten
1 T. cinnamon
1/8 t. salt
A couple of handfuls of chopped nuts (I used walnuts, but almonds, pecans, or hazelnuts would be tasty, too)
2 apples, sliced (I admit that I peeled mine this time)
Preheat oven to 350 F. Grease a 9 x 13" pan. Cube bread and put half of the cubes into the pan. Sprinkle with the sliced apples and chopped nuts. Top with remaining bread cubes. Combine eggs, milk, salt and cinnamon and drizzle slowly over bread, trying to cover all the cubes. Take the fork you used to mix the eggs/milk and squish down the cubes a little to soak up some more of the liquid. Place in oven for about 35 mins. Serve with maple syrup.
Friday, February 6, 2009
The cheaper the better?

It is not easy to live on one income these days, particularly with a large family. I am continually aware of the cost of gas, of sources for inexpensive clothing (the thrift store and hand-me-downs are my best friends!), of ways to save on electricity and the necessities of life. When searching for money-saving tips, I often come across articles on cutting the grocery budget. Sometimes, these articles are fabulous, offering great tips on eating real food and preparing it from scratch. However, I do come across lots of them that just don't sit really well with me. Sometimes, I find the authors seem almost hooked on the idea of getting the cheapest 'food' (and I use that term loosely) no matter what.
In our family, I try to cook as economically as possible, but the bottom line is not how cheaply we can eat. It is how healthy we can eat. It is about the nutritive value of what we put into our mouths, not the price tag. There are lots of foods with high nutritive value and a low price tag. Dried beans are a good example. There are also lots of foods with a high price tag and low nutritive value. A good portion of what you find in the average grocery store is a good example of that.
I took out a cookbook from the library a couple of days ago, called Cook with Jamie: My Guide to Making You a Better Cook by Jamie Oliver. I had heard he was a kindred spirit in terms of his love for real food and I was not disappointed. As I browsed through the chapters, I was struck by some of his comments on meat, which I would like to share with you. I think these apply to all food, but for some reason, especially so to meat.
Jamie shares that it is amazing how people are so aware of quality and value in the products they purchase. They know which brands are important to them and will often pay a hefty price for just the right one. He asks the reader to imagine he has just gone to the pub and asked for a particular brand of beer. If the pub doesn't have it, he will ask for a second favourite. If they don't have that, he will probably never return. He will certainly not say, 'What is the absolute cheapest beer you have?' Jamie adds, "When kids go to buy running shoes, they don't say to Mom, 'Any pair will do, the cheaper the better,' they are totally specific: Adidas, Nike - the ones with the blue stripes, the tag on the back, whatever."
The story is completely different when it comes to meat (and most other food, too.) Most people don't care where it "comes from, how it's been fed, looked after, slaughtered or butchered." Isn't that the truth? I would say that in our culture, people care almost exclusively about cost. I think most people believe that the nutrients and quality of the food they eat will remain the same no matter how cheap it gets. Sadly, that is far from the truth. In order to lower the price, corners must be cut. In the case of meat, this happens when animals are fed as cheaply as possible and housed as cheaply as possible. The result of an animal eating improperly is that the resulting meat will suffer in terms of quality and nutritive value. Remember, "You are what you eat?" There is an excellent article on one of the nutritive differences, specifically omega 3/6 ratio, between grass-fed animals and standard grocery store fare on Dr. Mercola's site. I really encourage you to have a look at it. (It is not at all difficult to understand, in case you are concerned about that!)
I remember last year at Christmas time, a local department store proudly displayed on the sign outside their store, "Shrimp Rings: 2/$3". Ugh.
Thursday, January 29, 2009
The Art of Bread Making
I love making bread. I have been making our family's bread for just about as long as I can remember. As a result, it is very easy for me and I can whip up a few loaves at a moment's notice. (Okay, I actually need about 3 hours notice, but you know what I mean). Homemade bread is so wonderful that when you bring a loaf to someone, they act as if you have just mastered French pastry-making!
One time, I can remember, we were having a backyard barbecue for a few friends. It was raspberry season and I had gone the day before to pick raspberries with my sister. I slaved over the making of two wonderful raspberry/peach pies. I poured my heart into them, even making woven lattice for the top. I couldn't wait to offer them to my guests. A few hours before they were to arrive, I got concerned that we might not have enough food, so I decided to whip up a few loaves of bread. Absent-mindedly, I tossed the loaves together and baked them.
When dinnertime arrived, the comments rolled forth about my bread. "Oh, this is the best bread I've ever tasted." "Oh, I can't believe you make homemade bread." "How in the world do you do this?" "I could never make bread. It is so difficult." I don't think it took more than about 20 minutes of my actual attention. When I served the pies, which were delicious I might add, I think a couple of people said they were good. Humph. THOSE had taken forever!
Many times, I get asked for my bread recipe, which I willingly share. However, several times the recipient has told me their bread didn't turn out the way mine did. That is because bread-making is an art, not a science. You can't just get a recipe, follow it exactly and have great bread. There are a number of factors at work:
Mostly Whole-Wheat Bread
makes 3 - 1 1/2 lb loaves
3 c. warm water
1 T. yeast
1/4 c. fat (I prefer melted butter or coconut oil)
1/4 c. sweetener (I use either honey or organic unrefined sugar -- use whatever you like, but no artificial sweeteners, please! We are trying to feed the yeast and yeast, unlike humans, is too smart to consume them.)
1 T. salt (I use a coarse, unrefined gray salt)
6 c. hard wheat berries if you have a grain grinder or 6 cups whole-wheat bread flour, if you don't
3-4 c. unbleached bread flour
1/3 c. gluten flour
(A note about flour: In doing the detective work with people who have told me their bread didn't turn out as well as mine, I have found the culprit is often the flour. The grocery store just doesn't seem like it is a very good place to buy flour. We have purchased for years from a local flour mill and can now buy the same flour at a small local store. (The mill stopped selling directly.) Grinding your own wheat is also an option with many benefits. Alternatively, you could try a food buying co-op or a health food store or maybe a local bakery. The exact brand of flour is not the issue. It is the freshness. Find good, fresh flour and your bread will be much better. Be sure to get 'bread' flour, not all-purpose. It has the highest protein content, making well-developed gluten.)
Place the water in the mixer bowl with the yeast. Stir a little to combine. Leave it to sit for a few minutes while you melt the butter. Yes, you can do this in the microwave and I admit that I often do, but it really isn't good for your food. Just get out a little pot and melt it on the stove. Stir in the salt and sweetener and combine. It doesn't matter if they dissolve. Grind your wheat if you are doing so.

Add the whole wheat flour, gluten flour and butter/salt/sugar mixture to the bowl. Put on the dough hook and turn on the mixer (stir speed at first, then speed 2 when the flour is no longer in danger of flying out) to combine everything. Once it looks pretty uniform, you can either leave it to sit for 15 minutes or so (sometimes I do, mostly I don't) or you can just start adding in your unbleached flour.
With the mixer running on stir speed, I add in the first couple of cups of remaining flour one cup at a time. Allow the dough to assimilate the flour before adding more. After the first two cups, I start adding it 1/4 c. at a time, mixing well after each addition. Knowing when to stop adding flour is a learned skill. You want to watch for the dough to start cleaning the side of the bowl. At first, when there is not enough flour added, you will notice that the dough will start sticking more to the sides. Add some more flour and wait patiently for it to assimilate. Eventually, it will become a nice smooth ball and will clean up the bowl. (If you aren't sure, err on the side of a little too sticky.) Now, you can turn the mixer up to speed 2 to knead the dough.
Knowing when to stop kneading is also a learned skill. With the Kitchen Aid, I find it is somewhere in the neighbourhood of 6 minutes. However, this is a very general guideline. When you think the dough looks nice and smooth and has kneaded for awhile, stop the mixer and pull off a golf-ball sized piece of dough. It should feel a bit like your earlobe. More importantly, though, you can do the 'window test'.

As you can see in the above picture, when stretched, I can see light through my dough without it ripping. This means the gluten has developed enough and the bread is ready to be set aside to rise. If you try to stretch it and you cannot get a window without it ripping, be patient and knead it some more until you can.
Remove the dough from the bowl and put a little splash of oil in the bowl. Form the dough into a ball and turn it around in the oil to coat both the dough and the bowl. Now, cover the dough. It would be much more romantic and healthier to cover the dough with a nice cloth. However, I find that I end up with dough sticking to the cloth, even if I wet it. I hate to post this, but I actually cover it with a plastic bag. (I'm so sorry.) I find it keeps the dough from drying out.
Place the bowl in a warm oven. 110 degrees is ideal, but many ovens don't have a 'proofing' setting. I was seriously ticked off when we bought a new stove and I found out it didn't go below 170 degrees. Apparently, the manufacturers think people are too dumb to cook their food at an appropriate temperature, so they make the oven unable to go below a setting which will sterilize the food. We need the yeast to stay alive to rise the bread, so killing it will not do. What I do is, begrudgingly, put my dough in the oven, set the temperature to 170, turn the timer on for 2 minutes and turn the oven off when it beeps. At no time do I open the door. This seems to work well.
Let the dough rise until doubled, about an hour or so. Punch it down to deflate it and squish it up a bit. Now, I suggest using a kitchen scale, but you don't have to. Measure out 1 1/2 lbs of dough, or just cut it into about 3 equal parts. I like measuring because then they all turn out even. Of course, adjust quantities up or down a little to even things up.
Prepare your pans. My friend, Elisa, shared a kitchen secret that has changed my life. If you combine 1/2 quantity of liquid lecithin with 1/2 quantity of oil, mixed together and brush this very lightly on your pans, grains will never stick to them. It is like magic. No more muffins sticking to the pans. No more bread ripping off in chunks. It is wonderful stuff. :)
(A note about pans. The type of pan you use makes a difference, particularly when baking whole wheat bread. Whole wheat bread needs a slightly narrower pan for support than white bread. My favourite pans are Norpro, which I bought here. She also has great bread bags, by the way. I was also lucky enough to find a few very similar pans with the namebrand 'Kaiser' at Winners, but I haven't seen any there since.)
Shape into loaves. To do this, I form each piece into a ball and then pinch the bottom in a few times. Making nicely shaped loaves is another learned skill. :) Place in pans and return to oven. Make sure they have lots of space around them to rise. Warm oven as above and leave to rise. Watch until the loaves are risen a bit less than you want them to be in the end. Leave them in the oven and turn the oven on to 350 degrees F.
Bake somewhere around 45 minutes, give or take. Knowing when to take the bread out is...say it with me, now...a learned skill. I watch for:
Tip the loaves out right away and leave them on a rack to cool. Let them cool as long as your self-control allows before slicing. 30 minutes is pretty good. If you slice them before this, you will probably crush them. I have also heard that too much steam will escape and the remaining bread will dry out too quickly, but we don't have experience with any 'remaining' bread. ;)
Bread Recipe for 20 qt. Hobart Mixer
makes 12 - 1 1/2 lb loaves
12 cups warm water
1/4 c. yeast
1 c. honey/sugar
1 c. melted butter/coconut oil
1/4 c. salt
3/4 c. gluten flour
20 c. hard wheat berries
Approx 8 c. unbleached bread flour
I combine everything but the unbleached flour and then leave to sit for 15 minutes, or just jump into the next step. I follow the basic method outlined above, except that I add in the flour 1 c. at a time. I timed how long I had to knead after adding all the flour and was very surprised that it took 20 minutes on speed 1 before the dough passed the window test.
I need to do two bakings, since my oven will only really hold 6 loaves at a time.
I hope this is helpful to you! I love helping others learn to make bread and would be happy to answer any questions in the comments section. :)
One time, I can remember, we were having a backyard barbecue for a few friends. It was raspberry season and I had gone the day before to pick raspberries with my sister. I slaved over the making of two wonderful raspberry/peach pies. I poured my heart into them, even making woven lattice for the top. I couldn't wait to offer them to my guests. A few hours before they were to arrive, I got concerned that we might not have enough food, so I decided to whip up a few loaves of bread. Absent-mindedly, I tossed the loaves together and baked them.
When dinnertime arrived, the comments rolled forth about my bread. "Oh, this is the best bread I've ever tasted." "Oh, I can't believe you make homemade bread." "How in the world do you do this?" "I could never make bread. It is so difficult." I don't think it took more than about 20 minutes of my actual attention. When I served the pies, which were delicious I might add, I think a couple of people said they were good. Humph. THOSE had taken forever!
Many times, I get asked for my bread recipe, which I willingly share. However, several times the recipient has told me their bread didn't turn out the way mine did. That is because bread-making is an art, not a science. You can't just get a recipe, follow it exactly and have great bread. There are a number of factors at work:
- the bread-maker's intuition (which comes from experience)
- the quality of the ingredients (type of flour, freshness of yeast, type of fat/sweetner, etc.)
- the equipment used (oven temperature, pans, mixer, etc.)
- the environment (temperature, humidity)
Mostly Whole-Wheat Bread
makes 3 - 1 1/2 lb loaves
3 c. warm water
1 T. yeast
1/4 c. fat (I prefer melted butter or coconut oil)
1/4 c. sweetener (I use either honey or organic unrefined sugar -- use whatever you like, but no artificial sweeteners, please! We are trying to feed the yeast and yeast, unlike humans, is too smart to consume them.)
1 T. salt (I use a coarse, unrefined gray salt)
6 c. hard wheat berries if you have a grain grinder or 6 cups whole-wheat bread flour, if you don't
3-4 c. unbleached bread flour
1/3 c. gluten flour
(A note about flour: In doing the detective work with people who have told me their bread didn't turn out as well as mine, I have found the culprit is often the flour. The grocery store just doesn't seem like it is a very good place to buy flour. We have purchased for years from a local flour mill and can now buy the same flour at a small local store. (The mill stopped selling directly.) Grinding your own wheat is also an option with many benefits. Alternatively, you could try a food buying co-op or a health food store or maybe a local bakery. The exact brand of flour is not the issue. It is the freshness. Find good, fresh flour and your bread will be much better. Be sure to get 'bread' flour, not all-purpose. It has the highest protein content, making well-developed gluten.)
Place the water in the mixer bowl with the yeast. Stir a little to combine. Leave it to sit for a few minutes while you melt the butter. Yes, you can do this in the microwave and I admit that I often do, but it really isn't good for your food. Just get out a little pot and melt it on the stove. Stir in the salt and sweetener and combine. It doesn't matter if they dissolve. Grind your wheat if you are doing so.

Add the whole wheat flour, gluten flour and butter/salt/sugar mixture to the bowl. Put on the dough hook and turn on the mixer (stir speed at first, then speed 2 when the flour is no longer in danger of flying out) to combine everything. Once it looks pretty uniform, you can either leave it to sit for 15 minutes or so (sometimes I do, mostly I don't) or you can just start adding in your unbleached flour.
With the mixer running on stir speed, I add in the first couple of cups of remaining flour one cup at a time. Allow the dough to assimilate the flour before adding more. After the first two cups, I start adding it 1/4 c. at a time, mixing well after each addition. Knowing when to stop adding flour is a learned skill. You want to watch for the dough to start cleaning the side of the bowl. At first, when there is not enough flour added, you will notice that the dough will start sticking more to the sides. Add some more flour and wait patiently for it to assimilate. Eventually, it will become a nice smooth ball and will clean up the bowl. (If you aren't sure, err on the side of a little too sticky.) Now, you can turn the mixer up to speed 2 to knead the dough.
Knowing when to stop kneading is also a learned skill. With the Kitchen Aid, I find it is somewhere in the neighbourhood of 6 minutes. However, this is a very general guideline. When you think the dough looks nice and smooth and has kneaded for awhile, stop the mixer and pull off a golf-ball sized piece of dough. It should feel a bit like your earlobe. More importantly, though, you can do the 'window test'.

As you can see in the above picture, when stretched, I can see light through my dough without it ripping. This means the gluten has developed enough and the bread is ready to be set aside to rise. If you try to stretch it and you cannot get a window without it ripping, be patient and knead it some more until you can.
Remove the dough from the bowl and put a little splash of oil in the bowl. Form the dough into a ball and turn it around in the oil to coat both the dough and the bowl. Now, cover the dough. It would be much more romantic and healthier to cover the dough with a nice cloth. However, I find that I end up with dough sticking to the cloth, even if I wet it. I hate to post this, but I actually cover it with a plastic bag. (I'm so sorry.) I find it keeps the dough from drying out.
Place the bowl in a warm oven. 110 degrees is ideal, but many ovens don't have a 'proofing' setting. I was seriously ticked off when we bought a new stove and I found out it didn't go below 170 degrees. Apparently, the manufacturers think people are too dumb to cook their food at an appropriate temperature, so they make the oven unable to go below a setting which will sterilize the food. We need the yeast to stay alive to rise the bread, so killing it will not do. What I do is, begrudgingly, put my dough in the oven, set the temperature to 170, turn the timer on for 2 minutes and turn the oven off when it beeps. At no time do I open the door. This seems to work well.
Let the dough rise until doubled, about an hour or so. Punch it down to deflate it and squish it up a bit. Now, I suggest using a kitchen scale, but you don't have to. Measure out 1 1/2 lbs of dough, or just cut it into about 3 equal parts. I like measuring because then they all turn out even. Of course, adjust quantities up or down a little to even things up.
Prepare your pans. My friend, Elisa, shared a kitchen secret that has changed my life. If you combine 1/2 quantity of liquid lecithin with 1/2 quantity of oil, mixed together and brush this very lightly on your pans, grains will never stick to them. It is like magic. No more muffins sticking to the pans. No more bread ripping off in chunks. It is wonderful stuff. :)
(A note about pans. The type of pan you use makes a difference, particularly when baking whole wheat bread. Whole wheat bread needs a slightly narrower pan for support than white bread. My favourite pans are Norpro, which I bought here. She also has great bread bags, by the way. I was also lucky enough to find a few very similar pans with the namebrand 'Kaiser' at Winners, but I haven't seen any there since.)
Shape into loaves. To do this, I form each piece into a ball and then pinch the bottom in a few times. Making nicely shaped loaves is another learned skill. :) Place in pans and return to oven. Make sure they have lots of space around them to rise. Warm oven as above and leave to rise. Watch until the loaves are risen a bit less than you want them to be in the end. Leave them in the oven and turn the oven on to 350 degrees F.
Bake somewhere around 45 minutes, give or take. Knowing when to take the bread out is...say it with me, now...a learned skill. I watch for:
- smell - you can tell when they are done because the house just smells right -- like super-yummy bread, not too yeasty and not overdone. You will get to know the smell. (You can use the smell method for cakes, too, by the way.)
- sight - the bread will be nicely browned all over
- sound - if you tap the bottom, it should sound hollow. I admit that I don't completely get this one, but it might be helpful for you.
Tip the loaves out right away and leave them on a rack to cool. Let them cool as long as your self-control allows before slicing. 30 minutes is pretty good. If you slice them before this, you will probably crush them. I have also heard that too much steam will escape and the remaining bread will dry out too quickly, but we don't have experience with any 'remaining' bread. ;)
Bread Recipe for 20 qt. Hobart Mixer
makes 12 - 1 1/2 lb loaves
12 cups warm water
1/4 c. yeast
1 c. honey/sugar
1 c. melted butter/coconut oil
1/4 c. salt
3/4 c. gluten flour
20 c. hard wheat berries
Approx 8 c. unbleached bread flour
I combine everything but the unbleached flour and then leave to sit for 15 minutes, or just jump into the next step. I follow the basic method outlined above, except that I add in the flour 1 c. at a time. I timed how long I had to knead after adding all the flour and was very surprised that it took 20 minutes on speed 1 before the dough passed the window test.
I need to do two bakings, since my oven will only really hold 6 loaves at a time.
I hope this is helpful to you! I love helping others learn to make bread and would be happy to answer any questions in the comments section. :)
Friday, January 23, 2009
I have something to tell you.
My red mixer is broken.
I happened awhile ago as I was mixing up a batch of 9 loaves of bread. I heard a clunk that didn't sound at all good, along with a nasty dragging sound. The hook had stopped turning. Very worried, I took out the dough, which by this time was pretty much done and turned on the mixer briefly. Nope. It was definitely seriously broken.
Upon investigation at the repair shop, it was discovered that a gear was broken. It had been repaired before, apparently, but the problem was not at all helped by the fact that it was completely dry. Jim, the wonderful man who gave us the mixer, had told me he had greased it, but we needed to do it again before using it. I didn't and that is why it broke. It is not a nice feeling to know you have been responsible for breaking an antique Hobart!
Our main problem at this point was to try to find a new part. It was not going to be easy as Hobart is not able to identify the model number of my mixer since it is an antique. My dad said he would take on the task of trying to find something.
The next thing I knew, though, my dad called to tell me he was driving to a little town a couple of hours away to buy me a new Hobart! (Well, not new. Probably by now you know what I mean when I say, 'new'. We do have a certain level of thriftiness to uphold, afterall.) Steve and my dad took a long drive last Friday and arrived home with this:

It is a 20qt. A-200 Hobart. I am floored. What a blessed mama I am to be surrounded by such incredibly generous family members. Imagine being given two Hobarts! I was immediately back in the bread factory business. Yesterday, I mixed up another 12 loaves. Here are the first six in my oven, ready to start rising:

I was thrilled to be baking bread again and our tummies were very happy, too. Sadly, though, my heart was still heavy. I had been given a beautiful, antique mixer by two very kind and generous people, we had it painted up to be a stunning accent in our kitchen (some people thought it looked like a fire hydrant, but what do they know?), baked up a few large batches of bread and cookies and proceeded to break it. It seemed such a shame to just abandon it for lack of a gear. I prayed for a solution for several days.
I hadn't told many people about the mixer breaking, as it was too sad for me. However, one day I shared the news with a dear friend. After consoling me (and congratulating me on the new one), she asked me what I was going to do with the old one. I had my answer. Her husband believes he knows someone who can make a replacement part. She will give the mixer a new home as she bakes bread for her five children and I can still come and visit it. Thank-you, Lord!
I happened awhile ago as I was mixing up a batch of 9 loaves of bread. I heard a clunk that didn't sound at all good, along with a nasty dragging sound. The hook had stopped turning. Very worried, I took out the dough, which by this time was pretty much done and turned on the mixer briefly. Nope. It was definitely seriously broken.
Upon investigation at the repair shop, it was discovered that a gear was broken. It had been repaired before, apparently, but the problem was not at all helped by the fact that it was completely dry. Jim, the wonderful man who gave us the mixer, had told me he had greased it, but we needed to do it again before using it. I didn't and that is why it broke. It is not a nice feeling to know you have been responsible for breaking an antique Hobart!
Our main problem at this point was to try to find a new part. It was not going to be easy as Hobart is not able to identify the model number of my mixer since it is an antique. My dad said he would take on the task of trying to find something.
The next thing I knew, though, my dad called to tell me he was driving to a little town a couple of hours away to buy me a new Hobart! (Well, not new. Probably by now you know what I mean when I say, 'new'. We do have a certain level of thriftiness to uphold, afterall.) Steve and my dad took a long drive last Friday and arrived home with this:

It is a 20qt. A-200 Hobart. I am floored. What a blessed mama I am to be surrounded by such incredibly generous family members. Imagine being given two Hobarts! I was immediately back in the bread factory business. Yesterday, I mixed up another 12 loaves. Here are the first six in my oven, ready to start rising:

I was thrilled to be baking bread again and our tummies were very happy, too. Sadly, though, my heart was still heavy. I had been given a beautiful, antique mixer by two very kind and generous people, we had it painted up to be a stunning accent in our kitchen (some people thought it looked like a fire hydrant, but what do they know?), baked up a few large batches of bread and cookies and proceeded to break it. It seemed such a shame to just abandon it for lack of a gear. I prayed for a solution for several days.
I hadn't told many people about the mixer breaking, as it was too sad for me. However, one day I shared the news with a dear friend. After consoling me (and congratulating me on the new one), she asked me what I was going to do with the old one. I had my answer. Her husband believes he knows someone who can make a replacement part. She will give the mixer a new home as she bakes bread for her five children and I can still come and visit it. Thank-you, Lord!
Thursday, January 15, 2009
Oatmeal for Breakfast...AGAIN?!?!

We have oatmeal a lot for breakfast in the winter. I generally make steel cut oats and I try to make them interesting sometimes by adding home canned fruit or apples and cinnamon. By this time of year though, I am hearing a bit of grumbling - and it isn't their hungry tummies.
However, I will not give in and buy cold breakfast cereal. I buy high-quality cold cereal occasionally in the summer, though I always prefer homemade granola. In the winter, though, it isn't happening. This morning, I came across a post at Robin's Heart of Wisdom/Heart at Home blog, which includes a huge list of toppings to spruce up oatmeal. Today is egg day at our house, but you can bet that tomorrow morning, I will be making jazzed up oatmeal!
Editing to add that I am not into all the 'low fat' and 'non fat' things she recommends. We will use this list as a stepping stone and substitute in the whole foods versions (or just skip some of the suggestions). Fat soluble vitamins, A, D, E and K, cannot be absorbed without fat. We, of course, don't microwave our oatmeal, either!
Monday, December 29, 2008
Gorgeous Yummy Granola

I hope you had a wonderful Christmas! We enjoyed Steve's homemade apple pie as usual, complete with a birthday candle and the singing of 'Happy Birthday Jesus', followed by the reading of Luke 2. It is always a very special morning with our immediate family and my dear Mother-in-Law, who sacrifices sweet sleep to drive to our place very early every year. Later on, we all trek over to my parents' home to join my parents, my siblings and their spouses for some extended family time.
On Boxing Day, I made some granola from a recipe that my dear friend, Elisa, made for the craft exchange I participated in in November. We are big granola lovers in our home. Many recipes are very similar, but this one was just different enough that I thought it was worth sharing with you. I only very rarely buy cold cereal, as it is way too processed for my liking, but I love the convenience. Granola that has been made ahead is just as convenient, much tastier and very healthy.
Molasses Maple Nutty Granola
(from If Kallimos had a Chef ~~ Debra Stark)
1 cup maple syrup
1/2 cup blackstrap molasses
1/4 cup canola oil
4 tsp cinnamon
6 cups oats
1 cup walnut halves
2 cups pecan halves
2 cups pumpkin seeds
1/2 cup sunflower seeds
(I have also added sesame seeds)
Preheat oven 300 degrees.
Combine wet ingredients. Combine dry ingredients. Pour wet over dry and mix well. Divide granola between shallow baking pans and bake in a 300 degree oven until roasted and dry, about 1 1/2 hrs. Stir every 15-30 mins. (Mine was ready after about 45 mins.)
Let granola cool completely before storing in air tight containers.
I hope you enjoy this recipe as much as I did. We love granola with farm fresh milk and home canned fruit. The only easier breakfast to make in the morning is 'geturoni', which is another one of my favourites. ;)
Saturday, December 20, 2008
Good Moms Make Waffles
 Photo Courtesy of groovehouse
Hey, I didn't say how often they make waffles!
Yesterday was one of those days where it was dreadfully snowy outside, several children slept in, and I started knitting and sewing before breakfast, which always leads to my being distracted and no one eating for awhile. Soon enough, it was 11am and everyone was complaining about being hungry. (Kids are so demanding, aren't they?!)
I decided to pull out the 'let's have a special brunch' card. This works very well for turning the work of two meals into one. And, better yet, the kids think you are great! The only stipulations are: it has to be something out-of-the-ordinary and relatively substantial and you have to offer some kind of half-decent snack in the mid-afternoon.
What could be more special than waffles?
I normally avoid making waffles, save once or twice a year, because I am too lazy to do all the work of beating egg whites and 'folding' them in. However, I found the ultimate lazy-mom's waffle method yesterday. Everyone LOVED them. They were completely whole-grain and extremely easy, but they didn't taste grainy at all. The recipe is from my MOMYS cookbook. We found this was enough for us with 4 1/2 waffles leftover. So, if Steve had been home and our baby was eating more, I think it would be about right for eight people. I love leftover waffles because they can go in the freezer and then I can knit instead of get the kids something to eat!
Blender Batter Pancakes or Waffles
(submitted to the cookbook by AnnMarie in Florida)
4 c. Buttermilk or Milk with 1T. yogurt (I used lemon juice)
1 c. Whole Millet
1 c. Whole Brown Rice
1 c. Oats (I used steel cut)
1 c. Soft Wheat Berries or other grain
1/3 c. Oil (I used unmelted butter -- I'm not a huge fan of seed/vegetable oil)
2 Eggs (I used three)
2 t. Baking Powder
1 t. Salt
1/2 t. Baking Soda
Place milk, oil/butter and grains in blender. Blend at highest speed for 4 minutes. If this is too much for your blender (ours is a Vita-Mix with a 2 litre capacity), reduce recipe. If the mixture does not hold a vortex, add a bit more milk. Cover this and let soak overnight or proceed to next step (I didn't soak the grains overnight). Add eggs and blend 1 minute. Add baking powder, salt and baking soda and blend briefly to mix in leavenings. Prepare pancakes or waffles from batter.
I used about 3/4 c. batter per waffle in our Belgian waffle maker. I let it cook 3 mins and they turned out perfectly. I served them with home-canned peaches and maple syrup.
Tuesday, December 16, 2008
'Tis the Season to Use Whole Nutmeg
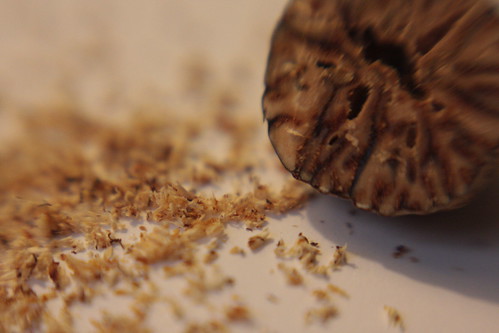 Photo courtesy of annosvixit
I know this is kind of insane, but I actually avoided using whole nutmeg because I thought you had to have a little, teeny grater to use it. I guess I knew you didn't have to have one, but I didn't bother to look for any alternatives that already existed in our home and kept using pre-ground nutmeg.
One day, I was making eggnog. I like to make eggnog to round out a lunch that I haven't made enough of an effort on. It is quick, healthy, a kid-favourite and guilt-banishing. Anyway, we were out of nutmeg. I remembered that my Mother-in-law had given me a couple of whole nutmegs (nutmeg cloves? nutmeg seeds? nutmeg pods?) several years ago. I hauled them out and thought about how I could grate them. Well...the grater, of course! I have one of those four sided cheese graters and I really only use one side. The side with the small bumps worked very nicely and the nutmeg was delicious in our eggnog. I knew I would never be buying ground nutmeg again!
The next time I made eggnog, I realized that my stainless steel rasp (which I use to grate lemon zest and other things) would probably do a great job on the nutmeg. I gave it a try and it was even better than the cheese grater!
If you aren't using whole nutmeg, I really encourage you to try using it. It made a huge difference in the flavour of our food and really wasn't very expensive at all (seeing as nutmeg does not take up much of our food budget)!
Oh, here is our eggnog recipe, in case you spend too much time reading blogs today and need to add something to your lunch of cheese, crackers and cucumber slices:
(We have a Vita-Mix, which holds 8 cups and this recipe fills it pretty well after 'fluffing'. Adjust quantities if your blender is smaller.)
Eggnog
Place in a large blender:
- 3 farm-fresh eggs
- 1/3 c. sucanat or unrefined sugar (okay...or just regular sugar!)
- a splash of vanilla extract
- some freshly grated nutmeg
Then, add milk to about the 5 1/2 c. level and blend slowly until well-combined. If you zing it around on high, you will regret it as it will make a lot of foam which will fall out of the top when you open the lid. You can grate a little extra nutmeg on the top of each glass if you like. Mmmmm! I almost want to go make some right now!
Monday, December 1, 2008
Need me to bake you anything in LARGE quantities?
This summer, we were on vacation in Northern Ontario on a small island which used to be an old Anglican Church Camp. No longer in use as a camp, the island is leased out to cottagers, but the old kitchen with all the big equipment still remains. My brother-in-law's father and uncle joined us, too, for about a week to do some fishing. While they were there, I was coveting the beautiful, large and unused 20qt. mixer in the backroom of the kitchen and wondering if there was any way Steve and I could purchase it and haul it home. Ian's uncle piped up, "How big a mixer do you want?" I said the one in the backroom was perfect. His response? "Well, I have a Hobart mixer about that size in my garage. If you want it, it's yours." WooHoo!!!
Jim's dad used to be a baker and Jim kept this antique, but well-working mixer in his garage. His wife, Wanda, was very happy to see it out of her garage and into a new home which would use it . :) Jim was kind enough to put on a new switch, power cord and do some greasing to get it running very smoothly. It needed some aesthetic help, which we finally ended up having done by a wonderful, local man who sandblasted the whole thing and painted it a fire-engine red! The other challenge was to find a dough hook. It wasn't easy, since no one could seem to identify the model. My dad and I were finally able to locate one at a restaurant supply place about 1 1/2 hours away. They were extremely helpful. We finally brought our new mixer home on Friday night and I was able to start using it on Saturday! So, without further adieu, I present...my new mixer:
 I know the bowl isn't perfect and shiny like the rest of the mixer, but it is very functional. On Saturday, I made 9 loaves of bread at ONE TIME!! I actually had to do two baking sessions since my oven can only hold 6 loaves. Yesterday, I made a huge batch of cookies, which I normally have to mix by hand in an extra large bowl because the recipe is too much for my Kitchen Aid.
My three year old thinks the paddle is great for licking, since it is many times bigger than the normal paddle she gets to lick!

Just for interest's sake, here is my mixer before we had it painted:

Jim's dad used to be a baker and Jim kept this antique, but well-working mixer in his garage. His wife, Wanda, was very happy to see it out of her garage and into a new home which would use it . :) Jim was kind enough to put on a new switch, power cord and do some greasing to get it running very smoothly. It needed some aesthetic help, which we finally ended up having done by a wonderful, local man who sandblasted the whole thing and painted it a fire-engine red! The other challenge was to find a dough hook. It wasn't easy, since no one could seem to identify the model. My dad and I were finally able to locate one at a restaurant supply place about 1 1/2 hours away. They were extremely helpful. We finally brought our new mixer home on Friday night and I was able to start using it on Saturday! So, without further adieu, I present...my new mixer:
 I know the bowl isn't perfect and shiny like the rest of the mixer, but it is very functional. On Saturday, I made 9 loaves of bread at ONE TIME!! I actually had to do two baking sessions since my oven can only hold 6 loaves. Yesterday, I made a huge batch of cookies, which I normally have to mix by hand in an extra large bowl because the recipe is too much for my Kitchen Aid.
My three year old thinks the paddle is great for licking, since it is many times bigger than the normal paddle she gets to lick!

Just for interest's sake, here is my mixer before we had it painted:

Pretty amazing, hey?
And, here is the Hobart's dough hook beside the Kitchen Aid's dough hook:

Funny, before we had six kids, I thought the Kitchen Aid was really big. ;)
I know we are going to get lots of use out of our new mixer. It had become a hassle to make a batch of bread (I could do three loaves at a time in my Kitchen Aid) knowing it would all be gone before the end of the day.
Jim and Wanda...God bless you! We are just loving our new Hobart!

Funny, before we had six kids, I thought the Kitchen Aid was really big. ;)
I know we are going to get lots of use out of our new mixer. It had become a hassle to make a batch of bread (I could do three loaves at a time in my Kitchen Aid) knowing it would all be gone before the end of the day.
Jim and Wanda...God bless you! We are just loving our new Hobart!
Tuesday, November 11, 2008
We eat food.

Opening the newest issue of Chatelaine or Today's Parent at the doctor's office will always result in finding another article on food and nutrition. Everywhere we turn, new information crops us about a nutrient the experts want us to eat more of or, more likely, something they want us to eat less of. As a society, we are obsessed with eating. The amazing thing is that with all this 'expert' information about food and nutrition, our population actually becomes more malnourished, overweight and unhealthy. Tragically, while experts are essential for more complicated subjects, relying on them to replace commonsense will always yield problems. Commonsense can not be broken down by science.
When you take a step back and think about it, isn't it bizarre that we actually need scientists to tell us how and what to eat?!
In the last year or two, I have done a lot of thinking about our diet. We have always had a very healthy diet, with a minimum of processed or convenience foods and only a rare meal out. However, I had definitely fallen trap to 'nutritionism'. Nutritionism assumes that you can take nutrients out of the context of food, rearrange them, in the form of vitamins or 'added value' products, and consume them for a healthy diet. The trouble is that humans are not all-knowing. We are always discovering new things and we really have no idea what we don't know. A healthy diet cannot be artificially created by combining the right nutrients. Even if it could, we have no idea what nutrients we have not discovered yet. In addition, we have, truly, no idea of the way different parts of food are supposed to work together. I think this Bible verse really speaks to our belief, as humans, that we can begin to understand the complexities of God's creation enough to try to rearrange what He has made:
For in measuring themselves by themselves, and comparing themselves among themselves, they are not wise.
2 Corinthians 10:12
2 Corinthians 10:12
This is an excellent verse for all kinds of situations in life. It reminds us that because we are humans, not God, we cannot accurately assess our own situation independent of Him. A friend gave the analogy of a fish in water. How does a fish know that it is wet? We are the fish here.
I, personally, am done listening to the experts and I have returned to commonsense. Our family has decided to put our trust in God and the way He has created food. One of La Leche League's 10 core concepts is an excellent statement on food, which I think sums up our family's philosophy well: "Good nutrition means eating a well-balanced and varied diet of foods in as close to their natural state as possible." That's it.
So, what does this mean for our family? For us, it means that in general, we make food from scratch. We are not concerned with what is not in food (low fat, for example) because we just eat food straight-up, not boxes or bags of things someone else has made. I only do one big-ish shopping trip to the grocery store about once a month, but even then I don't buy much. Why not? Because the majority of what is at the grocery store is not real food. It is substances that used to be food rearranged into something else. Basically, if it comes from a factory, we avoid it. (Not that we don't eat it ever. Don't get me wrong. This is our general policy.) We also don't put any stock in whether or not factory-made products come from the health food store. Organic whole wheat noodles with powdered cheese are still not real food. I believe these foods are a slight improvement over their grocery-store counterpart, but I don't rely on them to feed our family or convince myself that they can compare to food.
So, where do I shop, then?
- Steve and I make a weekly trip to the local Farmer's Market. We are very blessed to have a market that is open all-year. We try hard to eat seasonally and shopping at the market makes this possible. There is such joy in getting that first bushel of apples in the fall or in spotting the first asparagus of the spring.
- Next, we patronize a local organic, biodynamic farm. There, we have a CSA share both in the winter and the rest of the year. This provides the majority of veggies we need. We also purchase things like wheat, honey, eggs and meat from them.
- Once a month, I order from a health food co-op. This provides us with things like tea, dried fruit, some dried legumes, cream (that has only cream listed as the ingredient!), and the few factory foods that we still eat, such as wraps and crackers.
- And, as mentioned, I do a bigger shopping at the grocery store once a month and run to the natural food store for coffee cream and sour cream once in awhile.
Can I recommend some great reading to you, if you are interested in learning more? Michael Pollan has written some fantastic books. His most recent book, In Defense of Food had me saying, "YES!" out loud on more than one occasion. It is definitely worth 'devouring' and is almost certainly available at your local library. I would also recommend Real Food by Nina Planck, Animal, Vegetable, Miracle by Barbara Kingsolver and The End of Food by Thomas Pawlick (this one is Canadian).
Happy Eating!
Thursday, November 6, 2008
Holiday Homemaking Freebies
 Woohoo!! Joyous Home is putting together a terrific-sounding treat for us that they are calling: "12 Days of Holiday Homemaking", reminiscent of their wonderful magazine, Seasons at Home. Each of the 12 days will include freebies, such as: Holiday sewing, giving a Holiday tea, Holiday menu ideas, sweet treat ideas, Holiday bread making, traditions and more.
They are not requiring newsletter sign up or anything. It is just a gift to visitors. I really love Seasons at Home magazine, so I hope you will enjoy these free days! I can't wait to see them. :)
Saturday, October 25, 2008
Roasted Kale...you'll love it!
Do you have a list of healthy foods that you would like to include in your diet,but if you are honest you: a) don't really like them, and, b) don't know what to do with them? A couple of years ago, I would have said that kale was on my list. We get it often from our local CSA and while I used to agonize over how I could sneak it onto our plates, I now know exactly what I will do with it and am actually disappointed when it isn't in our weekly basket.
Here is the answer to all your kale woes! Everyone in our family gobbles this up almost before it reaches the table.
Roasted Kale
Preheat oven to 350 degrees.
Take any amount of kale. (Make sure you have enough -- this is yummy!)
Wash and dry, remove stems and rip into bite-sized pieces.
Put into a bowl, adding a few splashes of extra-virgin olive oil and a dash or two of fine sea salt. Toss it with your hands to coat well (it should be like a salad dressing, not dripping with the stuff, but well-coated).
Transfer to a cookie sheet, spreading out well so that it isn't all bunched up.
Bake about 10 minutes or until it is getting crispy edges.
Mmmmmmm...see if this isn't the best kale you've ever had.
Now, make sure to pick some up at the local farmer's market and make it again!
I'd love to hear how your family liked it. :)

Here is the answer to all your kale woes! Everyone in our family gobbles this up almost before it reaches the table.
Roasted Kale
Preheat oven to 350 degrees.
Take any amount of kale. (Make sure you have enough -- this is yummy!)
Wash and dry, remove stems and rip into bite-sized pieces.
Put into a bowl, adding a few splashes of extra-virgin olive oil and a dash or two of fine sea salt. Toss it with your hands to coat well (it should be like a salad dressing, not dripping with the stuff, but well-coated).
Transfer to a cookie sheet, spreading out well so that it isn't all bunched up.
Bake about 10 minutes or until it is getting crispy edges.
Mmmmmmm...see if this isn't the best kale you've ever had.
Now, make sure to pick some up at the local farmer's market and make it again!
I'd love to hear how your family liked it. :)
Subscribe to:
Posts (Atom)


 Posts
Posts


