(This is a little bit of knitting technical stuff, so if you aren't into knitting, feel free to skip today's post. Mostly, it is to be a home for the text directions I've 'interpreted' from a chart of a sock pattern I am working on. I want to be able to link others here who prefer text directions.)
When knitting, there are two ways instructions for the pattern are written, in text or chart format. A chart uses symbols to represent the different stitches to be worked. Text format just tells you outright. Some people's minds work in such a way that the symbols just make perfect sense to them and are very easy to understand. Other people find it tedious to work with symbols because their mind never seems to 'click' to get into the rhythm of understanding them this way and a lot of effort is required to knit from a chart as a result. I am this second type of person. I just need it spelled out for me.
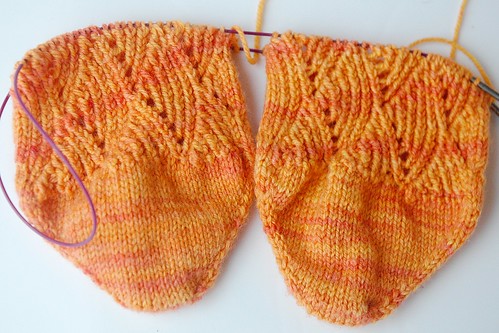
I had been working on some new, lovely socks called Pomatomus Socks. The designer, a knitting genius, has a mind that just seems to 'see' the pattern from the symbols on a chart, so her patterns are often written this way. I was enjoying the pattern, but finding it very tedious, so I decided to type up the directions in text. To make them easy to follow, I created a little set of index cards that I could flip over as I completed two rounds.

Here is how to make your own cards like I did:
- Type up the text instructions from the chart, round by round. (Of course, copy mine below if you are doing Pomatomus socks.)
- Double and triple check them, making corrections as necessary.
- In your word document, set up the page in 'Landscape', change to 'two columns', and add two spaces between each round of instructions.
- (I changed the font to 14.)
- Print the pages out.
- Cut the directions out into strips of two rounds at a time.
- Glue the strips onto index cards (so that two rounds are on each card).
- Hole-punch the cards and put them onto a little ring.
If you are here just for the text directions for Pomatomus Socks, here you go:
Cookie A’s Pomatomus Socks
Chart A (each line is repeated 6 times per round)
Round 1: (K1 tbl, P1) 5 times, K2tog tbl, YO
Round 2: (K1 tbl, P1) 4 times, K1 tbl, K2tog tbl, P1, YO
Round 3: (K1 tbl, P1) 4 times, k2tog tbl, P1, K1 tbl, YO
Round 4: (K1 tbl, P1) 3 times, K1 tbl, K2tog tbl, P1, K1 tbl, P1, YO
Round 5: (K1 tbl, P1) 3 times, K2tog tbl, (P1, K tbl) 2 times, YO
Round 6: (K1 tbl, P1) 2 times, K1 tbl, K2tog tbl, (P1, K1 tbl) 2 times, P1, YO
Round 7: (K1 tbl, P1) 2 times, K2tog tbl, (P1, K1 tbl) 3 times, YO
Round 8: K1 tbl, P1, K1 tbl, K2tog tbl, (P1, K1 tbl) 3 times, P1, YO
Round 9: K1 tbl, P1, K2tog tbl, (P1, K1 tbl) 4 times, YO
Round 10: K1 tbl, K2tog tbl, (P1, K1 tbl) 4 times, P1, YO
Round 11: K2tog tbl, (P1, K1 tbl) 5 times, YO
Round 12: YO, (K1 tbl, P1) 5 times, K2tog tbl
Round 13: P1, YO, (K1 tbl, P1) 4 times, K1 tbl, K2tog tbl
Round 14: P1, K1 tbl, YO, (K1 tbl, P1) 4 times, K2tog tbl
Round 15: P1, K1 tbl, P1, YO, (K1 tbl, P1) 3 times, K1 tbl, K2tog tbl
Round 16: (P1, K1 tbl) 2 times, YO, (K1 tbl, P1) 3 times, K2tog tbl
Round 17: (P1, K1 tbl) 2 times, P1, YO, (K1 tbl, P1) 2 times, K1 tbl, K2tog tbl
Round 18: (P1, K1 tbl) 3 times, YO, (K1 tbl, P1) 2 times, K2tog tbl
Round 19: (P1, K1 tbl) 3 times, P1, YO, K1 tbl, P1, K1 tbl, K2tog tbl
Round 20: (P1, K1 tbl) 4 times, YO, K1 tbl, P1, K2tog tbl
Round 21: (P1, K1 tbl) 4 times, P1, YO, K1 tbl, K2tog tbl
Round 22: (P1, K1 tbl) 5 times, YO, K2tog tbl
Chart B
Round 1: *(K1 tbl, P1) 5 times, K2tog tbl, YO, repeat from *, (K1 tbl, P1) 5 times, Sl 2, Place sl sts back on left needle, K3tog tbl, YO
Round 2: *(K1 tbl, P1) 4 times, K1 tbl, K2tog tbl, P1, YO, repeat twice more from *
Round 3: *(K1 tbl, P1) 4 times, k2tog tbl, P1, K1 tbl, YO, repeat twice more from *
Round 4: *(K1 tbl, P1) 3 times, K1 tbl, K2tog tbl, P1, K1 tbl, P1, YO, repeat twice more from *
Round 5: *(K1 tbl, P1) 3 times, K2tog tbl, (P1, K tbl) 2 times, YO, repeat twice more from *
Round 6: YO, *(K1 tbl, P1) 2 times, K1 tbl, K2tog tbl, (P1, K1 tbl) 2 times, P1, YO, repeat from *, (K1 tbl, P1) 2 times, K1 tbl, K2tog tbl, (P1, K1 tbl) 2 times, P1
Round 7: K 1 tbl, YO, *(K1 tbl, P1) 2 times, K2tog tbl, (P1, K1 tbl) 3 times, YO, repeat from *, (K1 tbl, P1) 2 times, K2tog tbl, (P1, K1 tbl) 2 times, P1
Round 8: K1 tbl, P1, YO, *K1 tbl, P1, K1 tbl, K2tog tbl, (P1, K1 tbl) 3 times, P1, YO, repeat from *, K1 tbl, P1, K1 tbl, K2tog tbl, (P1, K1 tbl) 2 times, P1
Round 9: K1 tbl, P1, K1 tbl, YO, *K1 tbl, P1, K2tog tbl, (P1, K1 tbl) 4 times, YO, repeat from *, K1 tbl, P1, K2tog tbl, (P1, K1 tbl) 2 times, P1
Round 10: (K1 tbl, P1) 2 times, YO, *K1 tbl, K2tog tbl, (P1, K1 tbl) 4 times, P1, YO, repeat from *, K1 tbl, K2tog tbl, (P1, K1 tbl) 2 times, P1
Round 11: (K1 tbl, P1) 2 times, K1 tbl, YO, *K2tog tbl, (P1, K1 tbl) 5 times, YO, repeat from *, K2tog tbl, (P1, K1 tbl) 2 times, P1
Round 12: (K1 tbl, P1) 2 times, K2tog tbl, *YO, (K1 tbl, P1) 5 times, K2tog tbl, repeat from *, YO, (K1 tbl, P1) 3 times
Round 13: K1 tbl, P1, K1 tbl, K2tog tbl, *P1, YO, (K1 tbl, P1) 4 times, K1 tbl, K2tog tbl, repeat from *, P1, YO, (K1 tbl, P1) 3 times
Round 14: K1 tbl, P1, K2tog tbl, *P1, K1 tbl, YO, (K1 tbl, P1) 4 times, K2tog tbl, repeat from *, P1, K1 tbl, YO, (K1 tbl, P1) 3 times
Round 15: K1 tbl, K2tog tbl, *P1, K1 tbl, P1, YO, (K1 tbl, P1) 3 times, K1 tbl, K2tog tbl, repeat from *, P1, K1 tbl, P1, YO, (K1 tbl, P1) 3 times
Round 16: K2tog tbl, *(P1, K1 tbl) 2 times, YO, (K1 tbl, P1) 3 times, K2tog tbl, repeat from *, (P1, K1 tbl) 2 times, YO, (K1 tbl, P1) 3 times
Round 17: K1 tbl, *(P1, K1 tbl) 2 times, P1, YO, (K1 tbl, P1) 2 times, K1 tbl, K2tog tbl, repeat from *, (P1, K1 tbl) 2 times, P1, YO, (K1 tbl, P1) 3 times
Round 18: K1 tbl, *(P1, K1 tbl) 3 times, YO, (K1 tbl, P1) 2 times, K2tog tbl, repeat twice more from *
Round 19: K1 tbl, *(P1, K1 tbl) 3 times, P1, YO, K1 tbl, P1, K1 tbl, K2tog tbl, repeat twice more from *
Round 20: K1 tbl, *(P1, K1 tbl) 4 times, YO, K1 tbl, P1, K2tog tbl, repeat twice more from *
Round 21: K1 tbl, *(P1, K1 tbl) 4 times, P1, YO, K1 tbl, K2tog tbl, repeat twice more from *
Round 22: K1 tbl, *(P1, K1 tbl) 5 times, YO, K2tog tbl, repeat twice more from *


Wow thanks! I tried this pattern from the chart but had to give up as I just couldn't get my head round it. Really like the pattern so will give it another go.
ReplyDeleteI gave up on the chart and just fudged, and while my socks turned out okay it would have been great to have this. I was always reading the chart saying I need to purl and I was on a knit stitch. I think CookieA would be fine with this. Thanks
ReplyDeleteYou are welcome! Just to let you know, I found one error in my original on round 9 of chart B, which I have fixed in the post. I did double check very carefully -- my apologies. :)
ReplyDeleteA reader sent me this fabulous idea, which I thought I would share with you:
ReplyDelete"Thanks for the text version of her charted pattern! I bought 4x6 index cards that came on a spiral holder. Then, I copied & pasted the pattern directions onto Avery Mailing Labels (2" x 4") & I stick these onto the cards. (This way I don't have to try & decipher my own hand-writing. LOL!)"
hi, found you through ravelry, THANK YOU! i despair when i see charts! next time i come across a good sock pattern with a chart i'll share with you (and ravelry) as if i really want to do it i've been known to write out charts too
ReplyDeleteThank you for sharing your chart in text! I am looking forward to making the socks now! Lily
ReplyDeleteknitso and Lily,
ReplyDeleteI'm so glad you are here! I hope you will share your successes with me if you make the socks. :)
Hey...you have inspired me! I used your idea in reverse. I'm working on an afghan that has 4 graphed designs, Knit R1 of design 1, then R1 of design 2, etc. It was mind boggling! So, I used you idea w/the ring binder & graphs. Please check my blog when you get a chance. http://luvsknitting.blogspot.com/2009/02/new-project-summit-hill-afghan.html
ReplyDeleteThanks so much for this idea. I am knitting a lace scarf from Kay Meadors book I Can't Believe I am Lace Knitting and this will help a lot! I can't tell you how many times I have started over!!! THANKS!
ReplyDeleteI simply love you!!!!
ReplyDeletePlease explain to me how you did this - I have sat looking at chart B for hours and I still don't understand what to do about its odd shape! Am I being totally daft?
All this is assuming your written instructions include the sts that show up as blank on the chart.
I've never felt the need to post a comment before so this selecting a profile thing is a worry - I think I'm gonna have to go with anonymous - but I do have a name - Ruth (in Sussex UK)
Please post here how you got past my mental block.
Deb - I visited your lovely blog awhile ago. I love looking at others' knitting projects - so inspiring!
ReplyDeleteNancy - I'm glad the idea was helpful to you. I would really like to get that book out of the library. I heard a review on the KnitPicks podcast and it sounded great.
Ruth - those 'blank' boxes are simply stitches that don't exist and you just ignore them. I think in this case, it is one reason that text directions work better for some of us. Cookie actually says that despite the way it looks because of the chart, the pattern is not actually square. Some of the things she does (like the weird shape chart) and the moving stitches around after Chart A are to square it up so it will work for socks. I suggest, if you want to make them, just blindly follow the directions for awhile and you should begin to understand the pattern. :) Christine
I think I love you ;) lol that must have taken a long time to write out & you have saved me a big job, thank you!! Your socks look gorgeous by the way.
ReplyDeleteCarrie,
ReplyDeleteYou are so very welcome. It wasn't too bad writing out and the heartache it saved me by having text directions was very worth it. :) It was taking me forever to use the chart -- kept losing my place and having to decipher where I was constantly. The text made the pattern whip by.
Thanks for the compliment on my socks, too. :)
Christine
I just tried to use your written instructions and was consulting the chart to go with it. The chart reads right to left. Am I suppost to read the written instructions right to left also? Because that is the only way the chart matches up with the written instructions.
ReplyDeleteKate: Yes. That's absolutely right. Read it right to left. :)
ReplyDeleteChristine
Hi Christine, just left a comment on the Rav post about this topic. I'm copying your instructions and doing the index card method. Thanks so much.
ReplyDeleteDear Christine,
ReplyDeleteI really had a Problem with Chart B but this was very helpful. Thank you very much!